

3d Parallax Photography Tutorial
Some 2 weeks ago I started working on a little project. The idea was to take standard photos that I liked a lot and present them in a dynamic manner that simulates a camera. Now some day I want do do real camera work and timelapse but untile then this was the best I could do. I am not the inventor of parallax or the first one to use it, eve I have been ocassionaly using it since 10 years ago when I had to do a salami TV commercial using just a photo (the company had no budget for a video so they taught they could pay me a couple of bucks for something similar). Usually photographers do this in Adobe After Effects or similar and very few work with 3d software. I do that too ocassionally like this photo compilation of the protests in Bucharest:
http://www.youtube.com/watch?v=0WzIURKdVKU&hd=1
But for this I needed something more. I needed real geometry and real reflections, not just some layers that may look cool but not as real. Therefore I taught that maybe since I have not been using 3d studio max for a while this would be a good chance to remember and maybe learn something new. And learn I did. This is the result of a bit of hard work, a lot of Photoshop selecting 🙂
Please watch in FULL HD.
Music is from a great romanian songwriter that the world has not heard of yet but will soon : Lex Dumitru .
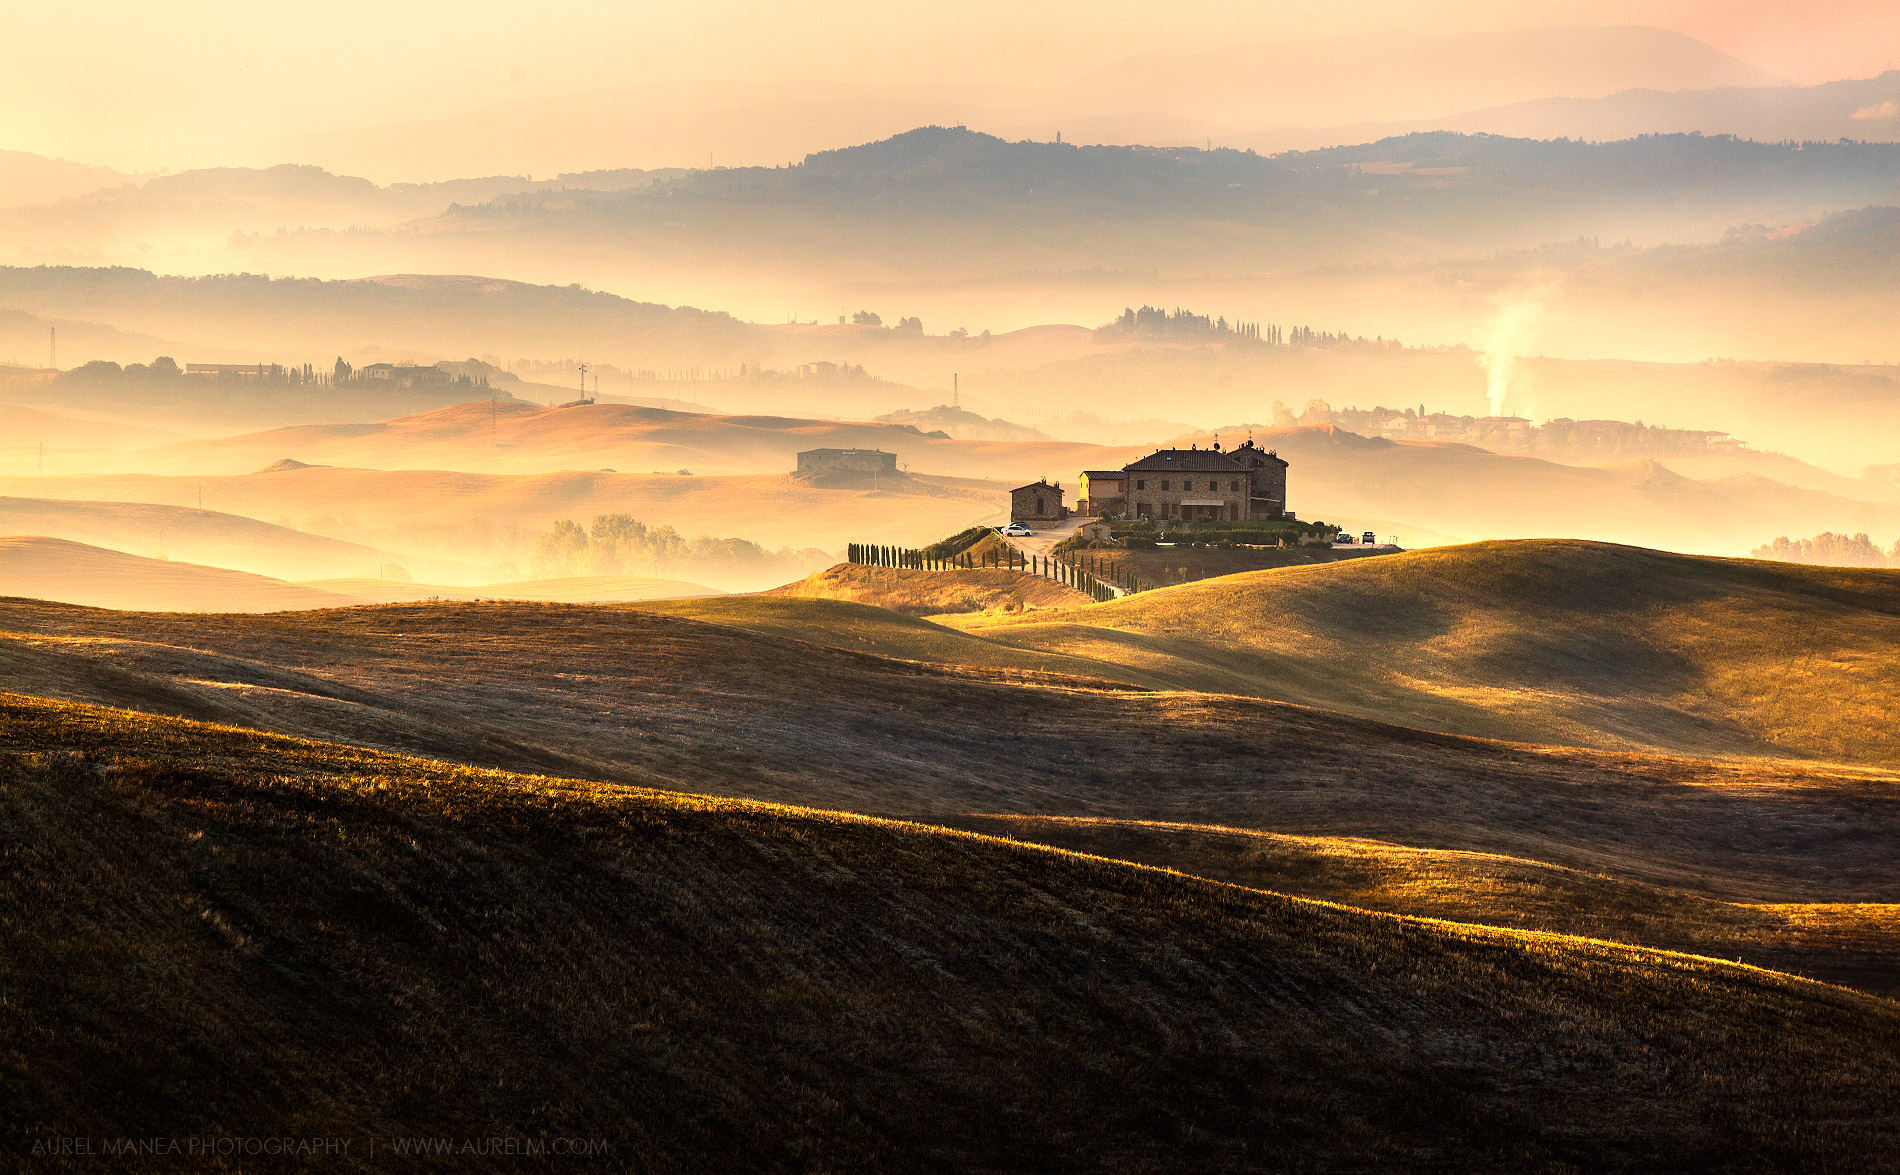
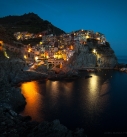
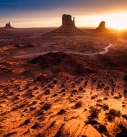
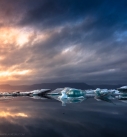
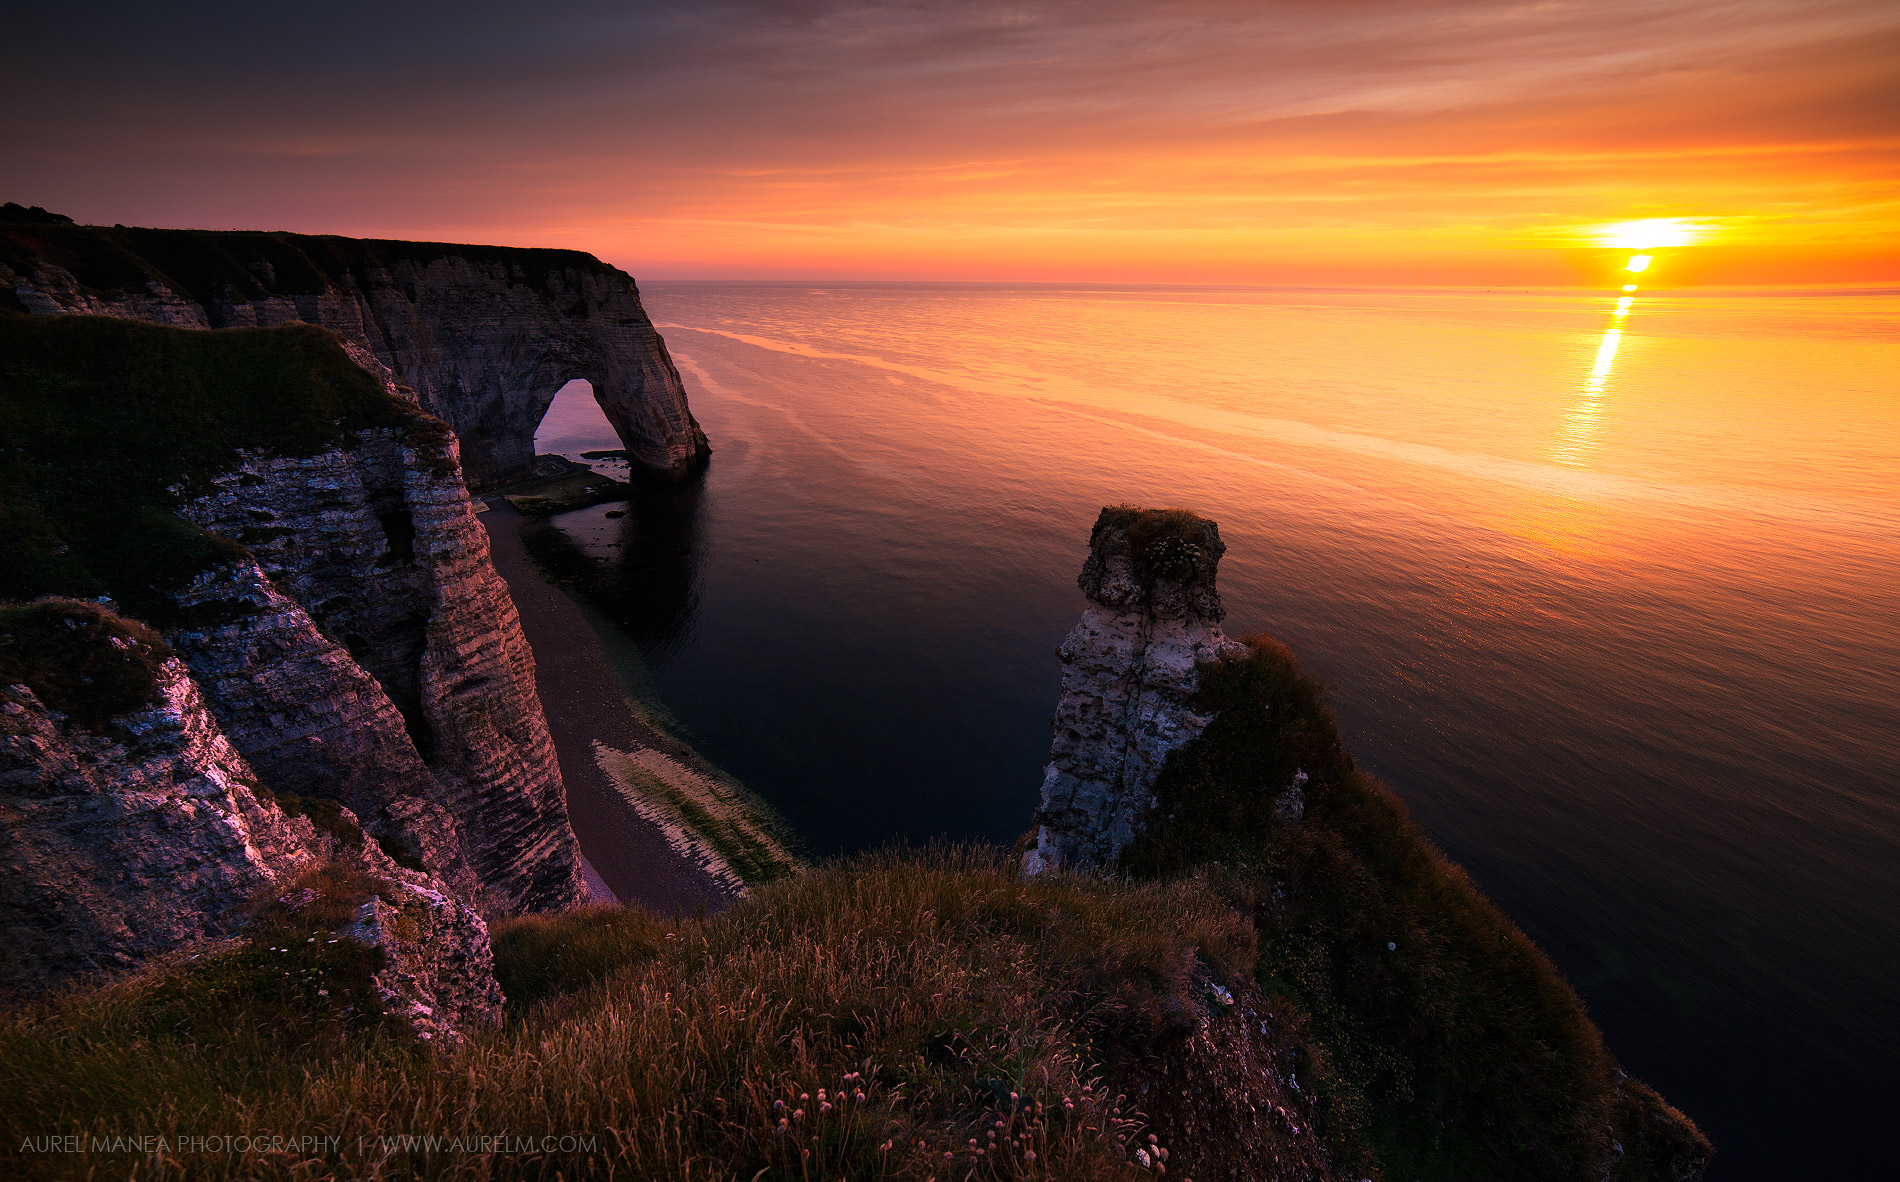
And these are the original photos I used to make the short:


Of course, later on I had the idea of using the same technique into a realtime interactive version of the project. After 2 weeks of restless but god damn fun work trying to figure out Javascript and Three.js this was the result.
Tutorial
Upon a lot of requests I made a short tutorial on how it was done
Please note that this is a tutorial for medium/advanced users in photoshop and 3dmax andI take for granted a decent understanding of 3d studio max, photoshop and editing . A complete tutorial would be too difficult and also pointless.
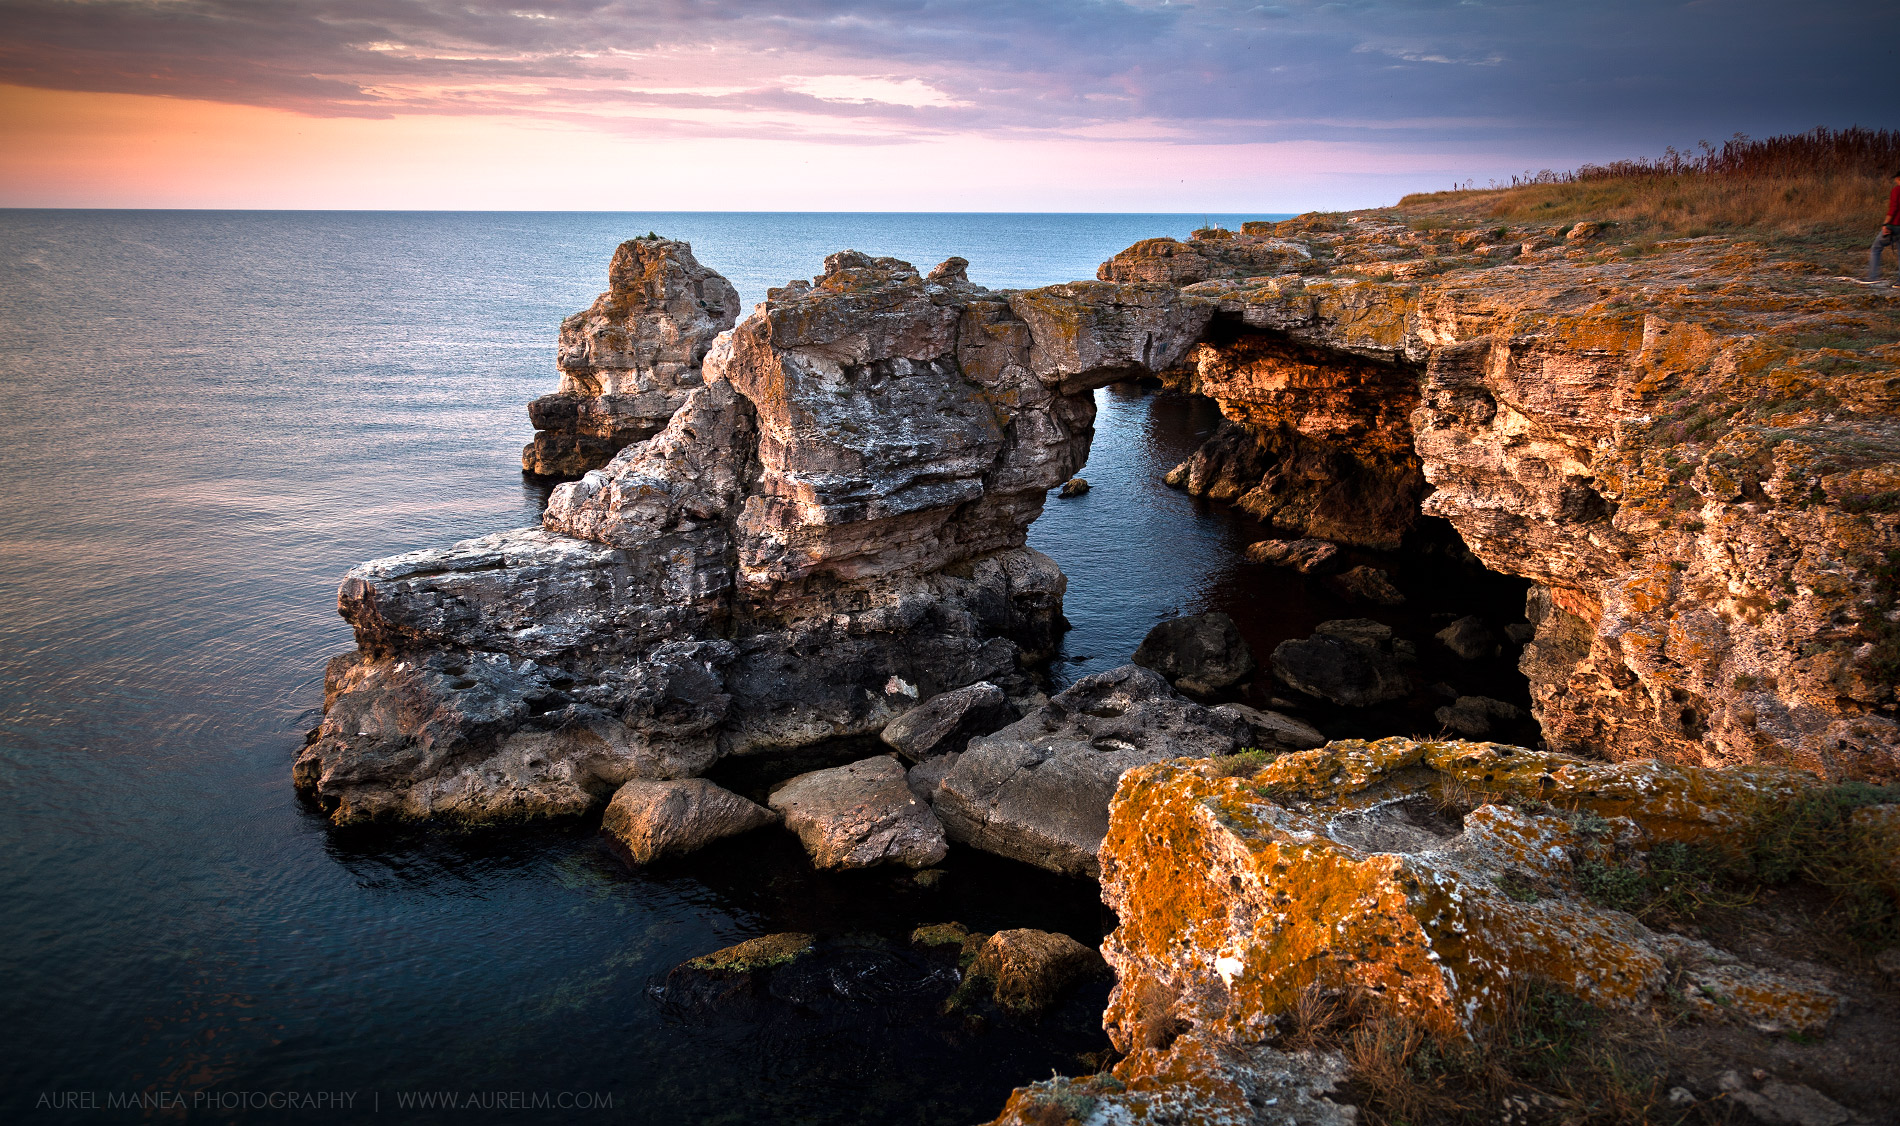
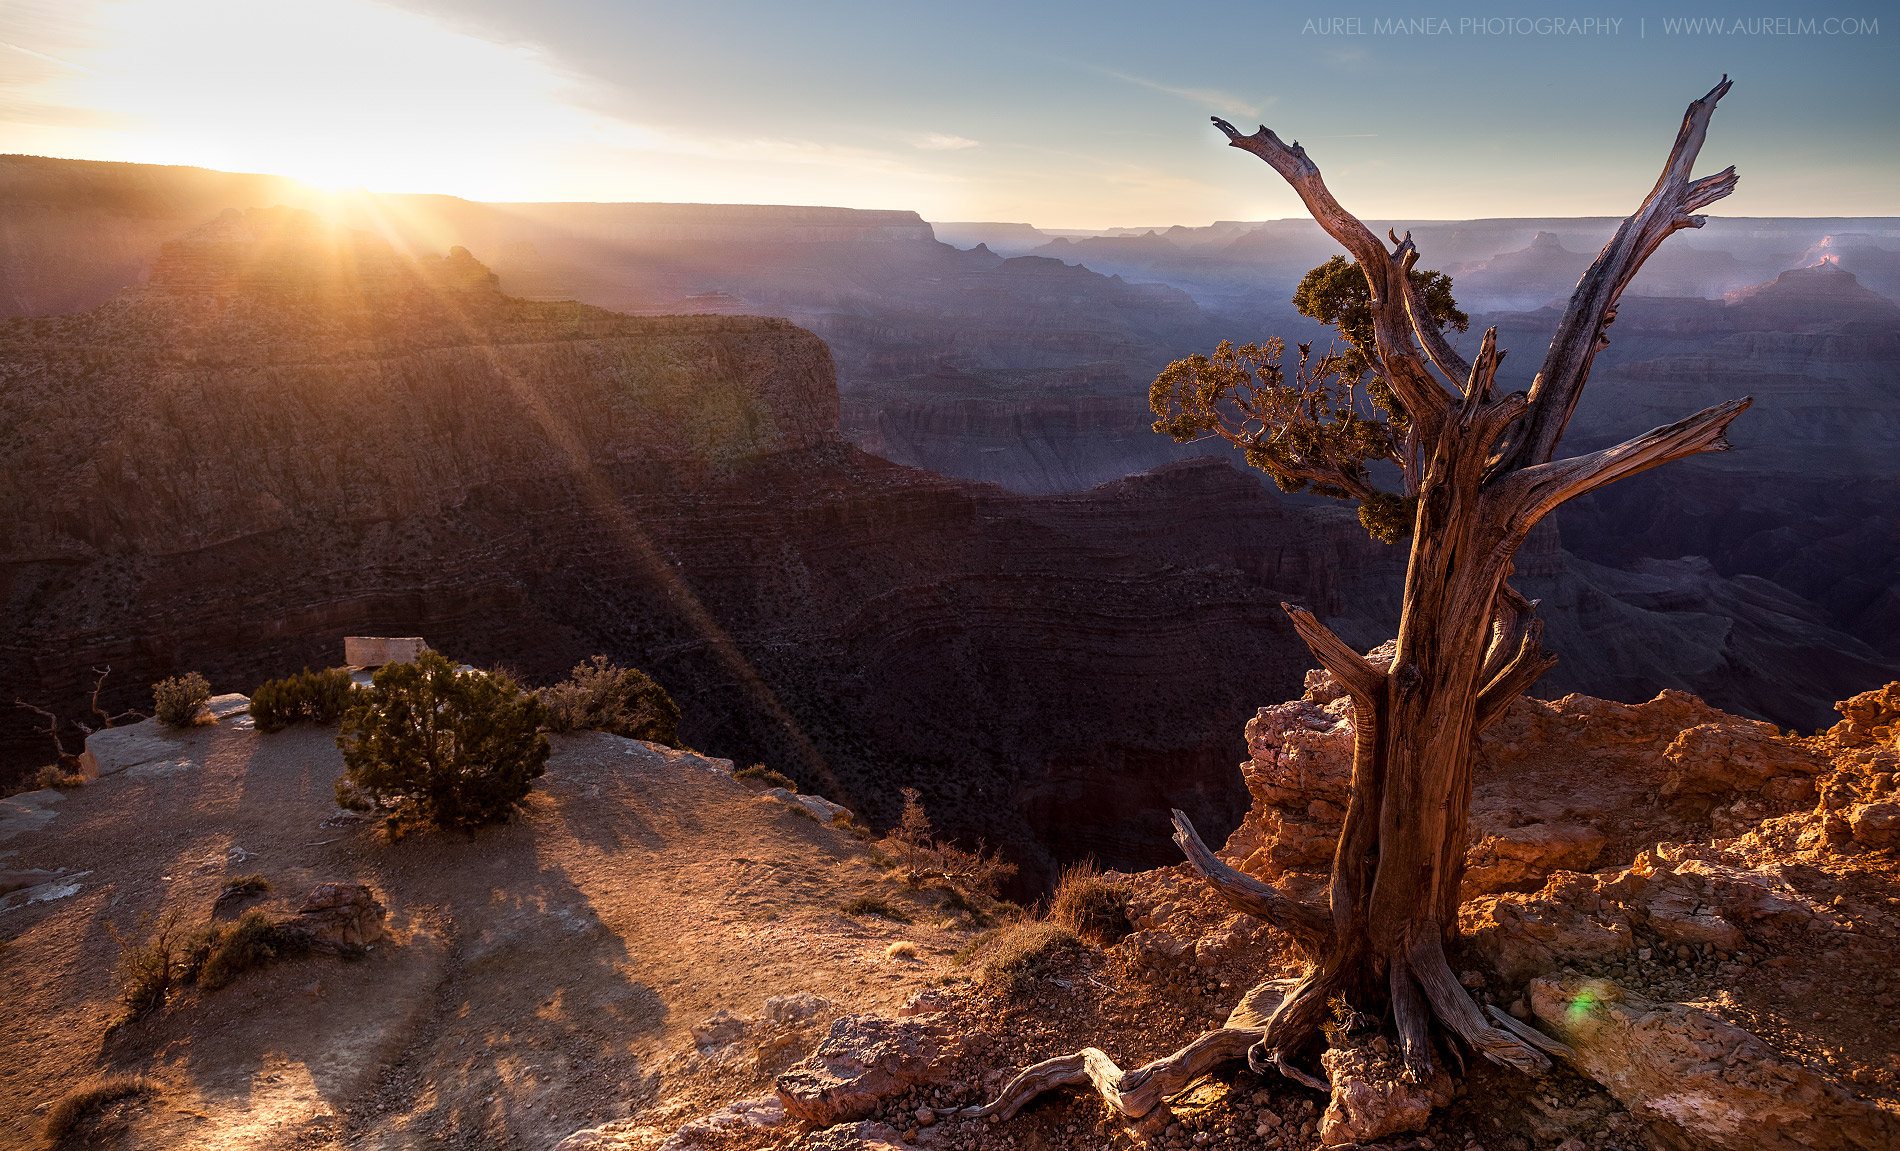
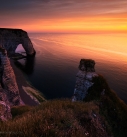
First part in trying to do something like this is to chose the photos that you can work with. Not all photos can be animated like this or they are just waaay too difficult. Try and imagine a forest that you need to separate in photoshop into trees. Now the human eye works in mysterious ways so even if in a big scene you have little details that show no parallax (like grass on a rock), if you have eye catching parallax everywhere else the eye will be fould into thinking everything is ok. If you look carefully for example in the first scene you will see that the bush and grass show no movement and are mapped on the rock.
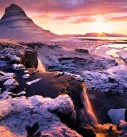
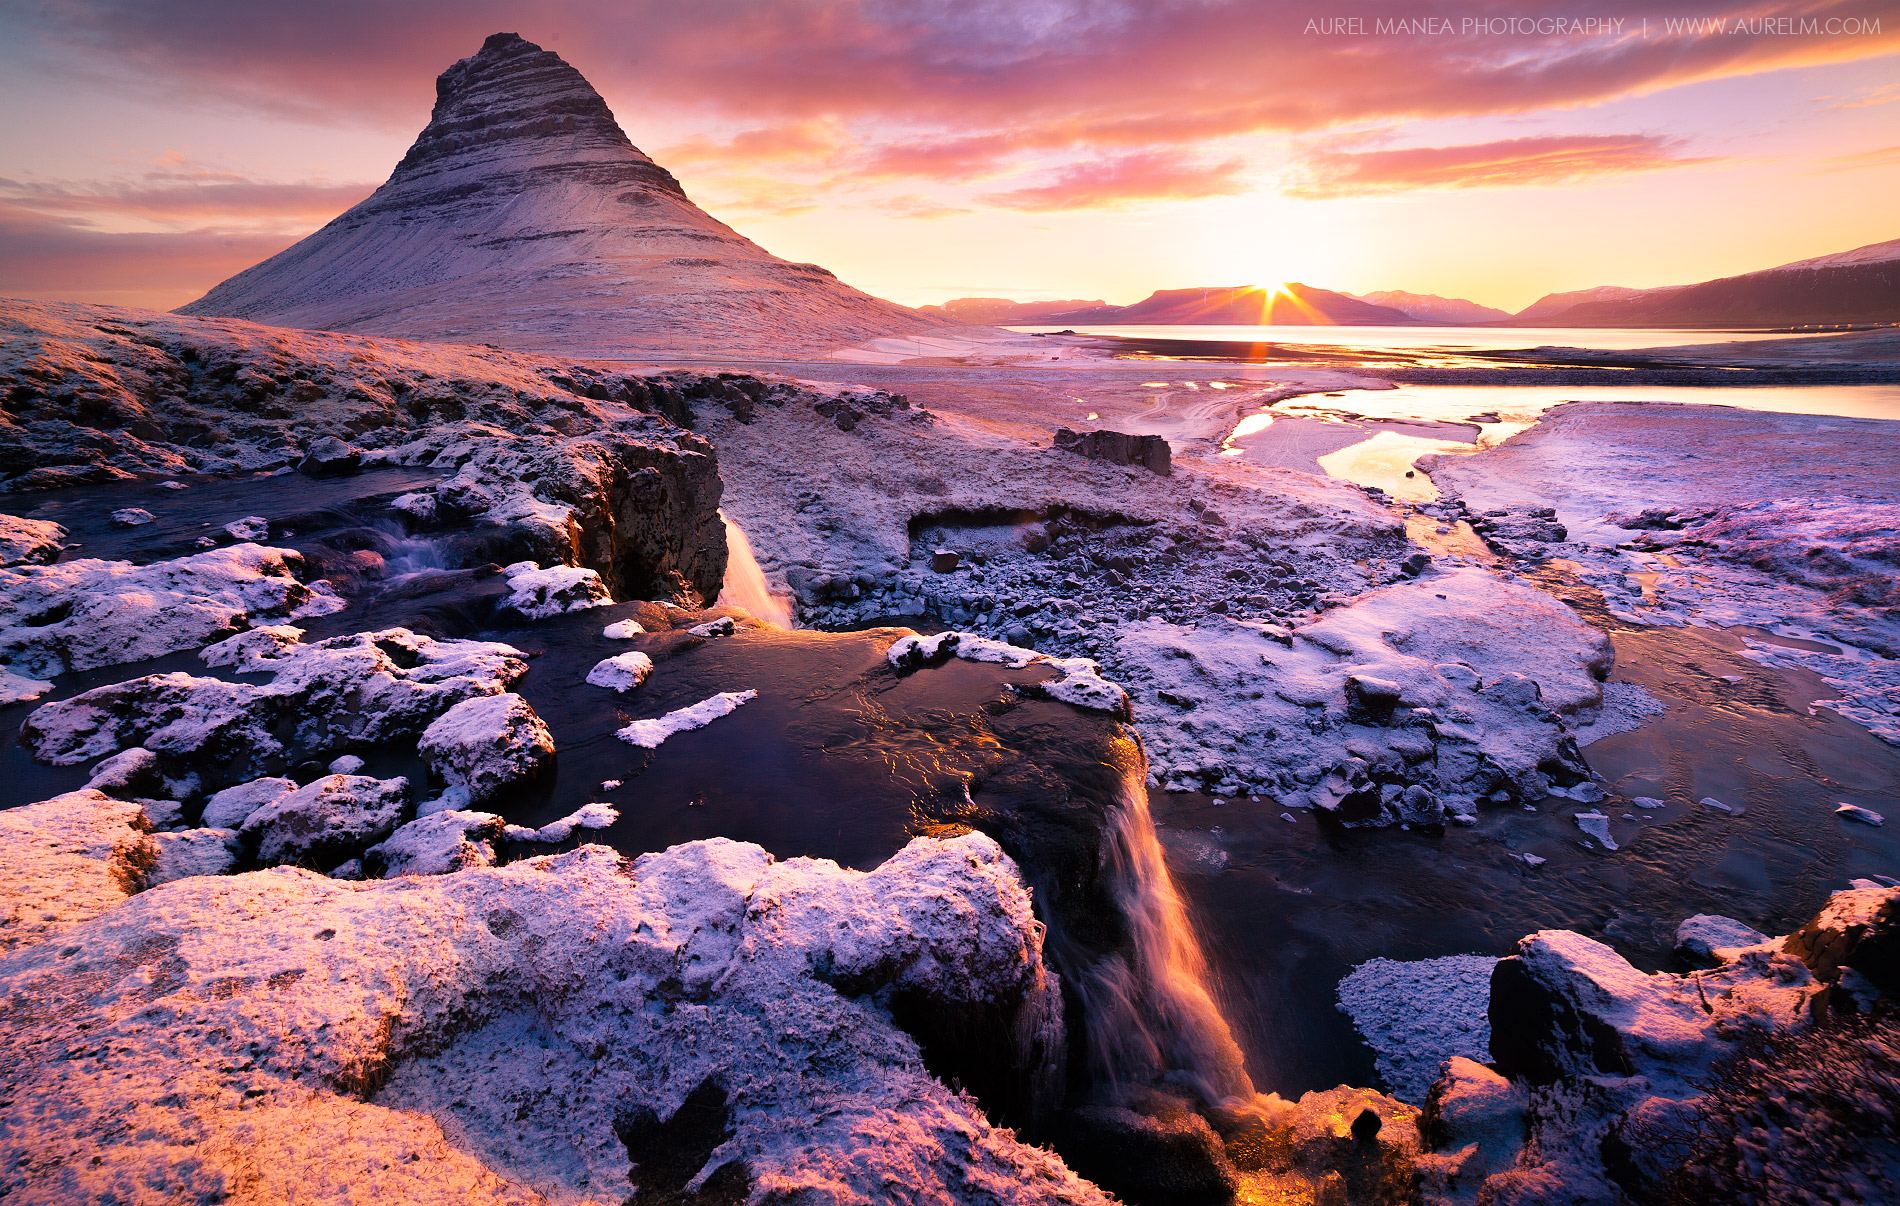
For this example I will use this image to show a bit of how the trick is done. I chose this one because it is a good example of what can be done and has plenty of perspective.
So this is the original photo (taken as usual in Iceland 🙂 ):
In photoshop:
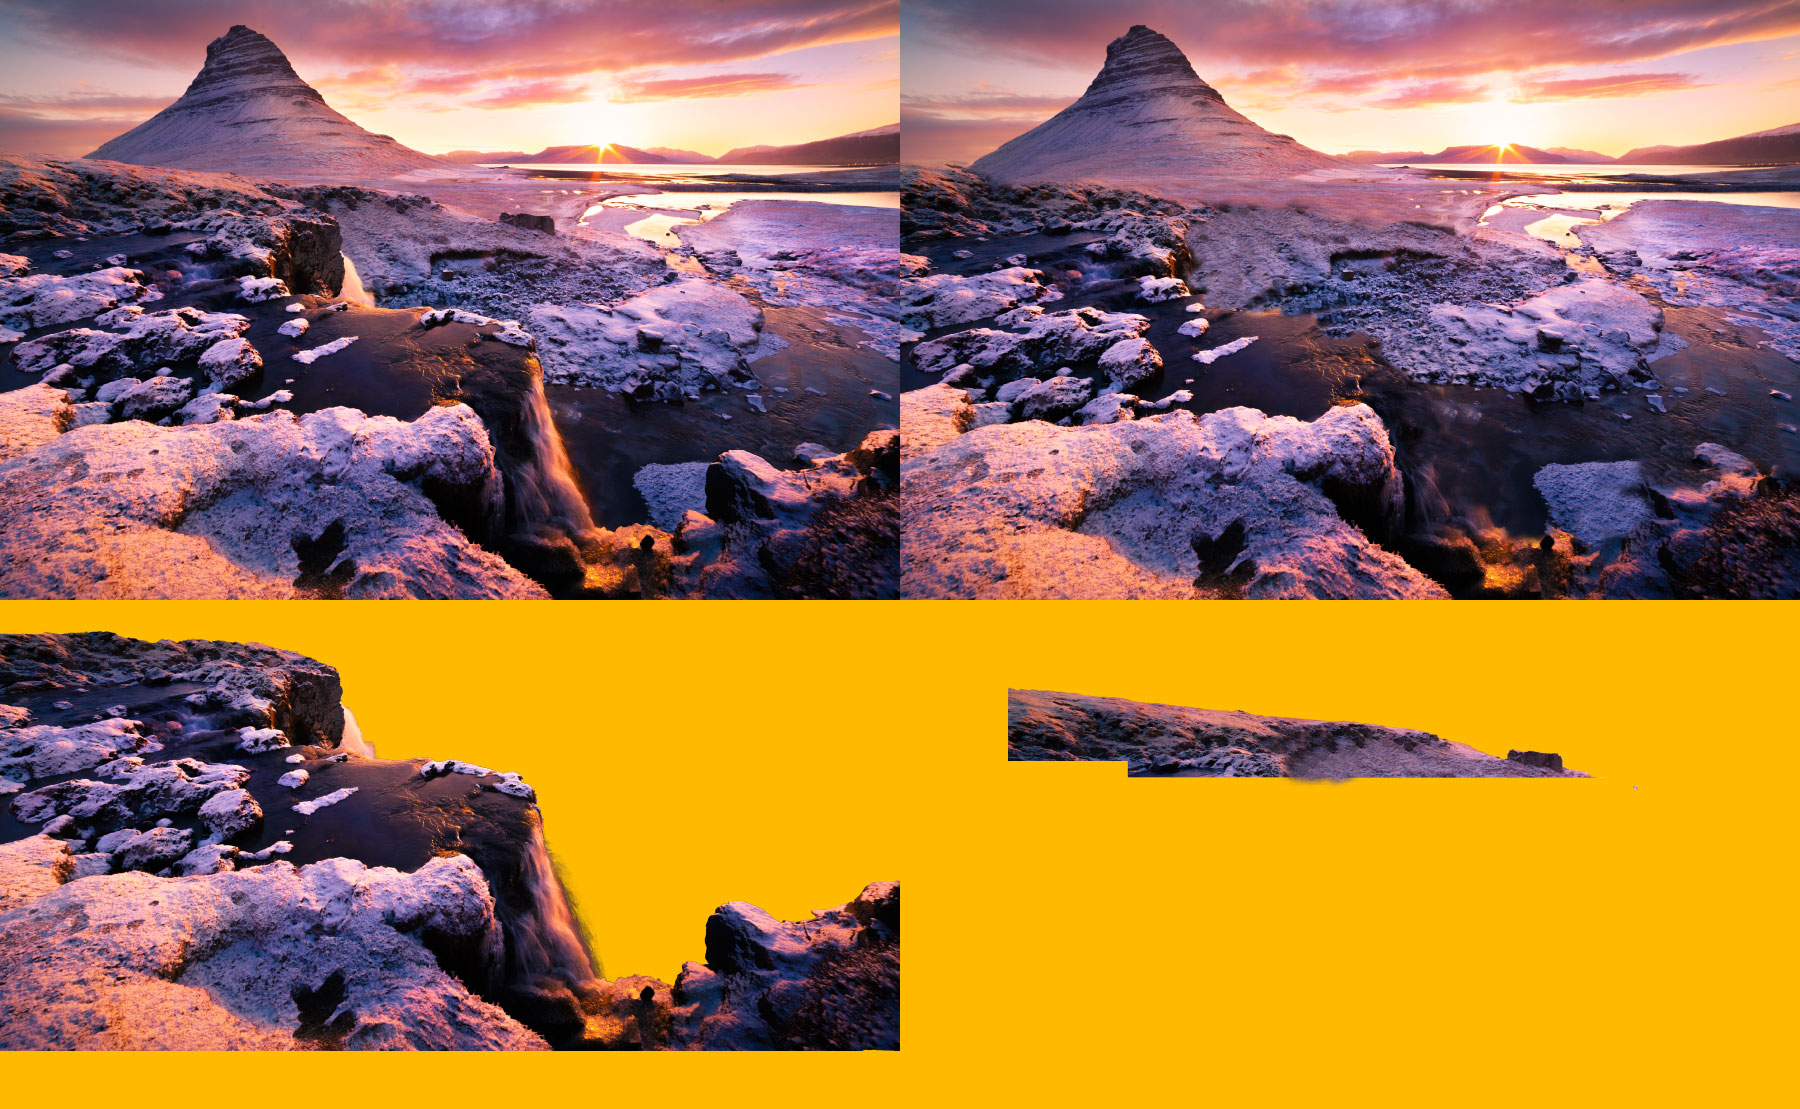
You need to study the scene carefully. Imagine a subtle camera movement and try and see what elements would need to obtruct/reveal other elements. For example in this scene I came up with these 3 elements.
-The first image is the original one.
-The second image is the base background used for the ground plane and regenerated
-Third image is the base foreground geometry.
-Last image is a layer that was needed in the background.
Now use any techniques available and possible to select the areas you need to cut. You can use black and white masks, magic lasso, normal lasso, magic wand anything that helps you cut as fast and best as you can. Remove color bleeding, always use “refine selection” tool to refine the edge and tweak the edge detection, softness etc. The end result must be a perfect selection without too much color bleeding.
After you have made a selection and created a layer from that you need to go back to the original layer and regenerate the detail that would have been there if in reality what you just removed from the photo would reveal. I used a combination of content-aware fill using the original (increased a bit) selection + a lot of cloning, manual patching and stuff. Just generate as much detail as needed for you camera movement. Always visualize the animation you want to achieve in your head and work with that.
Also please try and remove elements like lens flares. You should add those in post processing as they require special dynamics that cannot be obtained from the original photos.
After you have all the layers you need (you might add more later) save each of them as a separate file with EXACTLY the same size and positioning in the scene as the original image. For each save an alpha channel as a separate file or inside the main file (I use TGA with alpha channel).
It should each look like this:
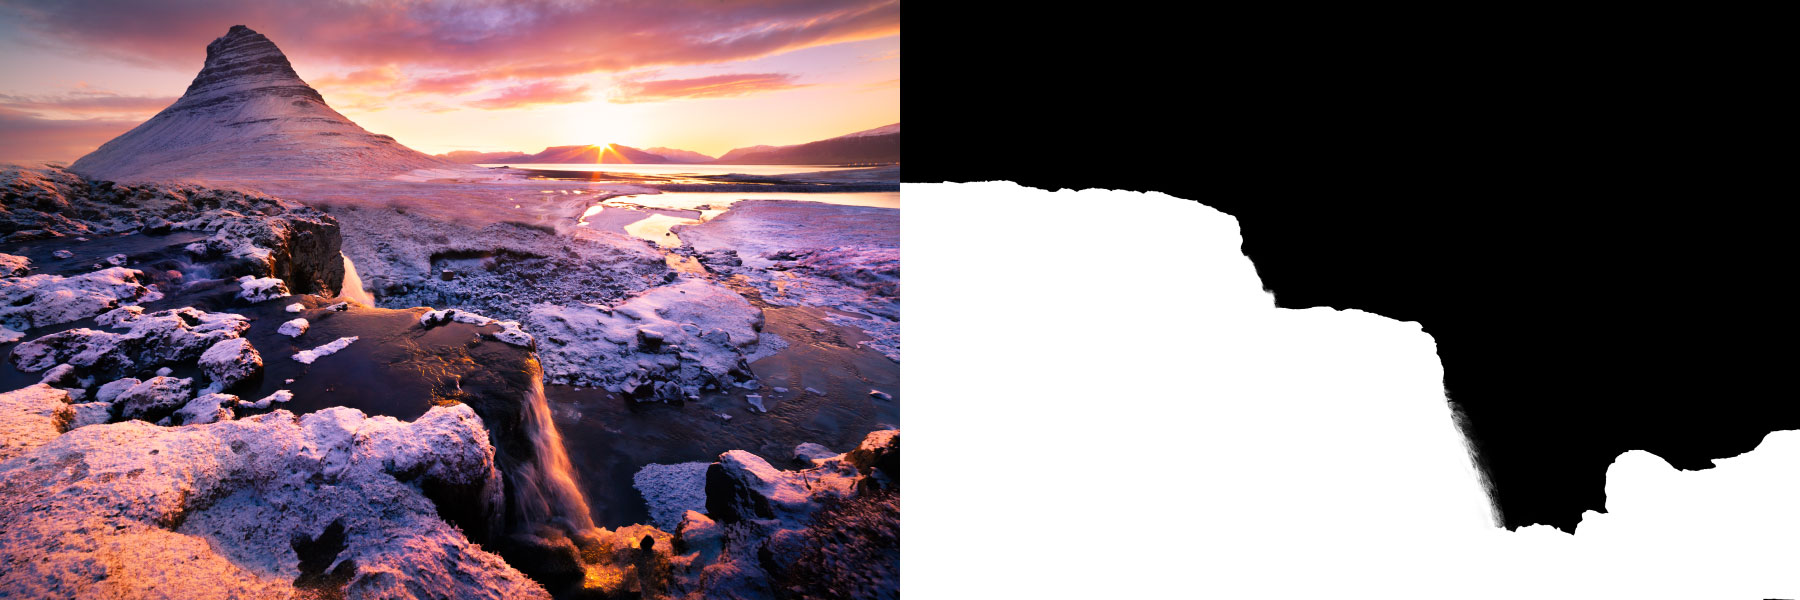
As you will see in the end other scenes require other type of layers and masks but for now this should be it.
Now for 3D MAX.
First thing in 3ds max is :
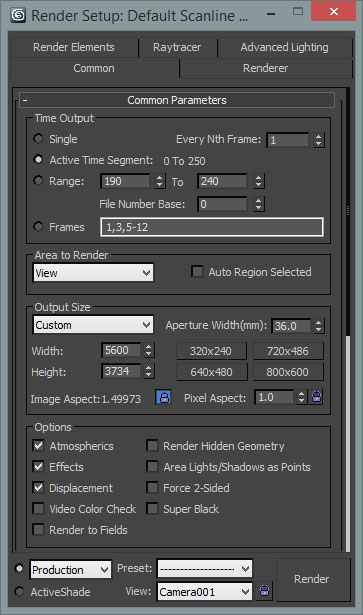
Set up render size to have the exact proportions and resolution of the original photo from Render/Render setup
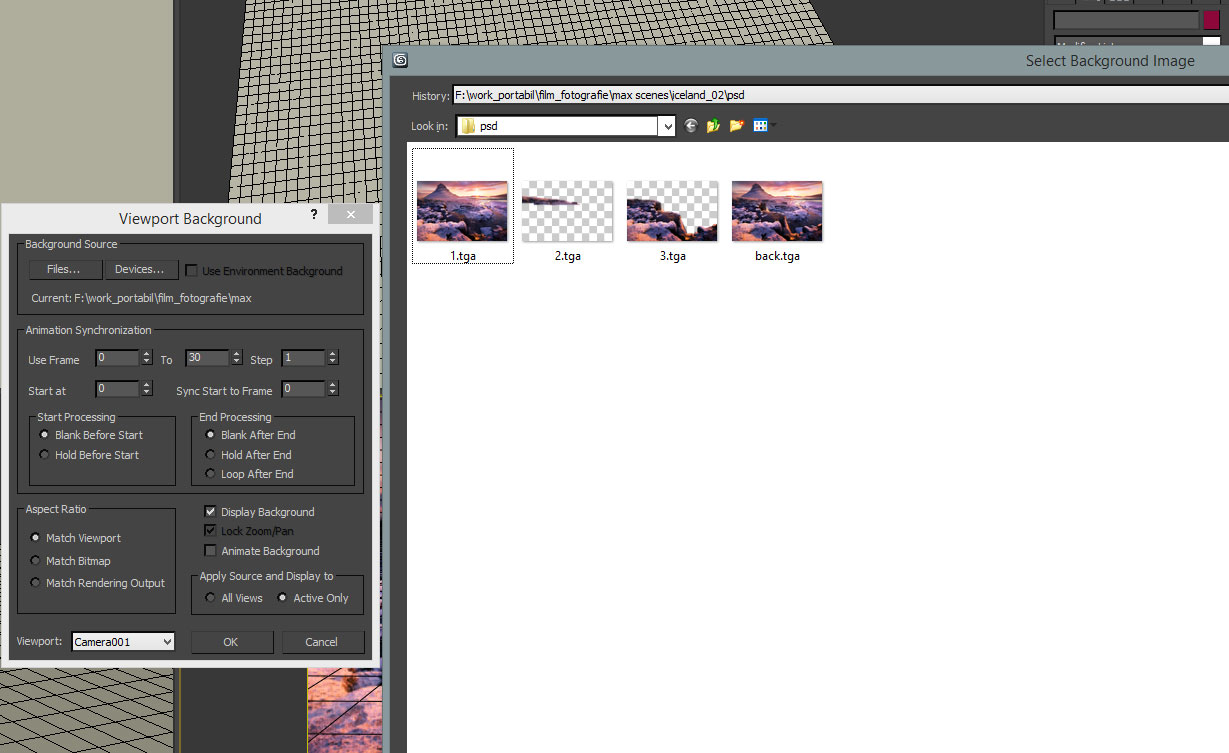
Set up one of the viewport’s backgrounds to be the original image. Go to Views/viewport background and set up that image on the current viewport.
Set up viewport safe frames so what you view is exactly the aspect ratio of the photo. Right click the name of the viewport (perspective for example) and activate safe frame.
Now you are ready to go.
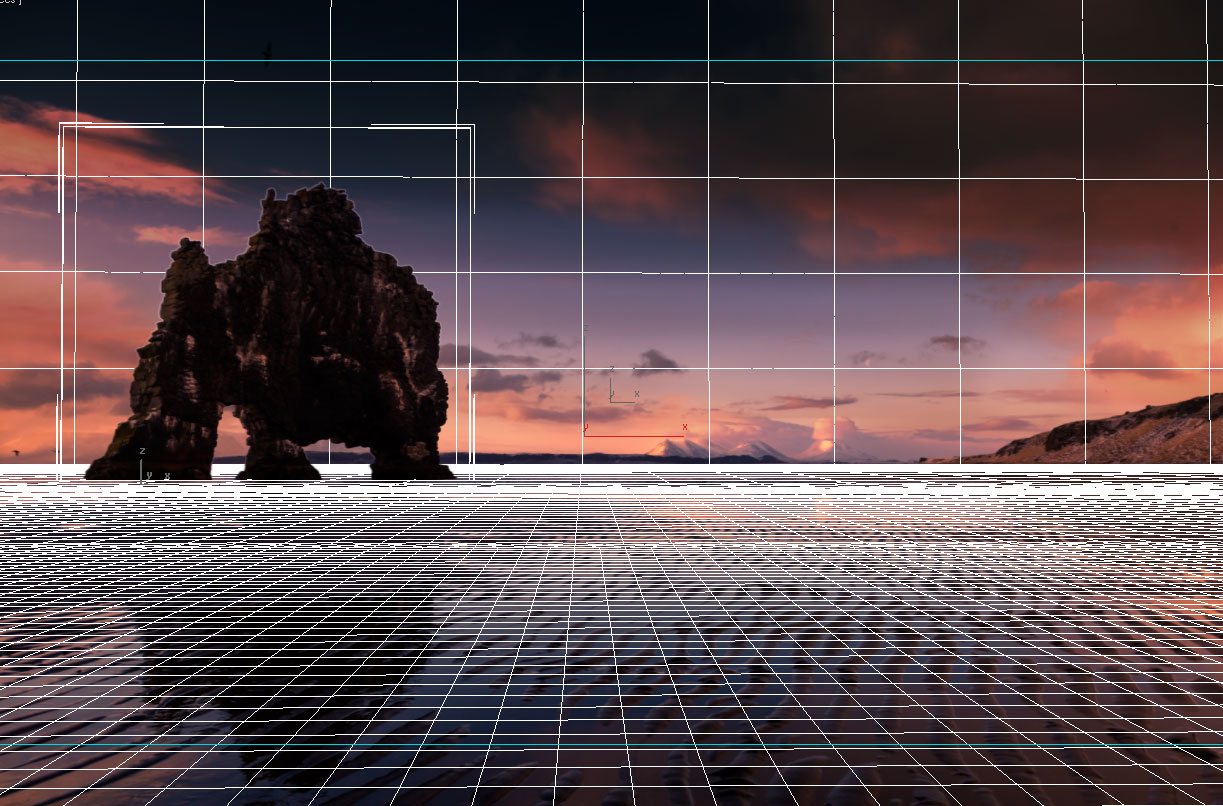
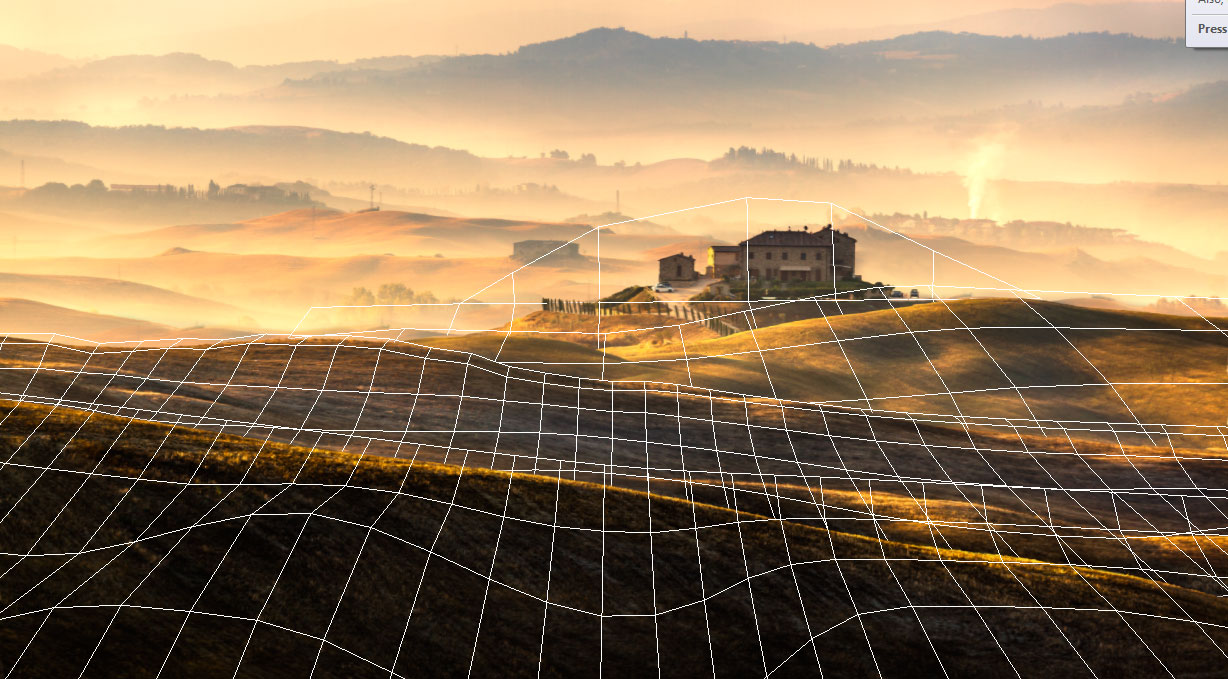
Now you need to create a camera (use your intuition) that match the perspective of the photo.Use wireframe mode in the viewport so you can see the background. I just created a default camera and moved it around. I don’t think there’s a clear way how to do this except matching it by hand. At the same time create 2 planes, one horizontal and one vertical that simulate the ground plane and a virtual sky plane that match the ones in the photo. At the same time adjust the camera angle so that the perspective is similar. Again there is no right way how to do this, just try, make mistakes, try again until you get something that fits the viewport background image like this screenshot here:
You an try and estimate the real distance at witch the camera was placed in the real scene and the angle. You don’t have to go all the way to infinity with the horizontal plane, usually after 200 meters the parallax effect is so subtle you can just stop there, like in this scene.
Now for the fun part. Create a material for the ground plane. Use the texture that contains the background that you cleaned in photoshop without the waterfalls and the small hill in the background. Apply it and set it up self-illumination for that material to 100. That means it will not be affected by any light in the scene and will look exactly like the diffuse texture.
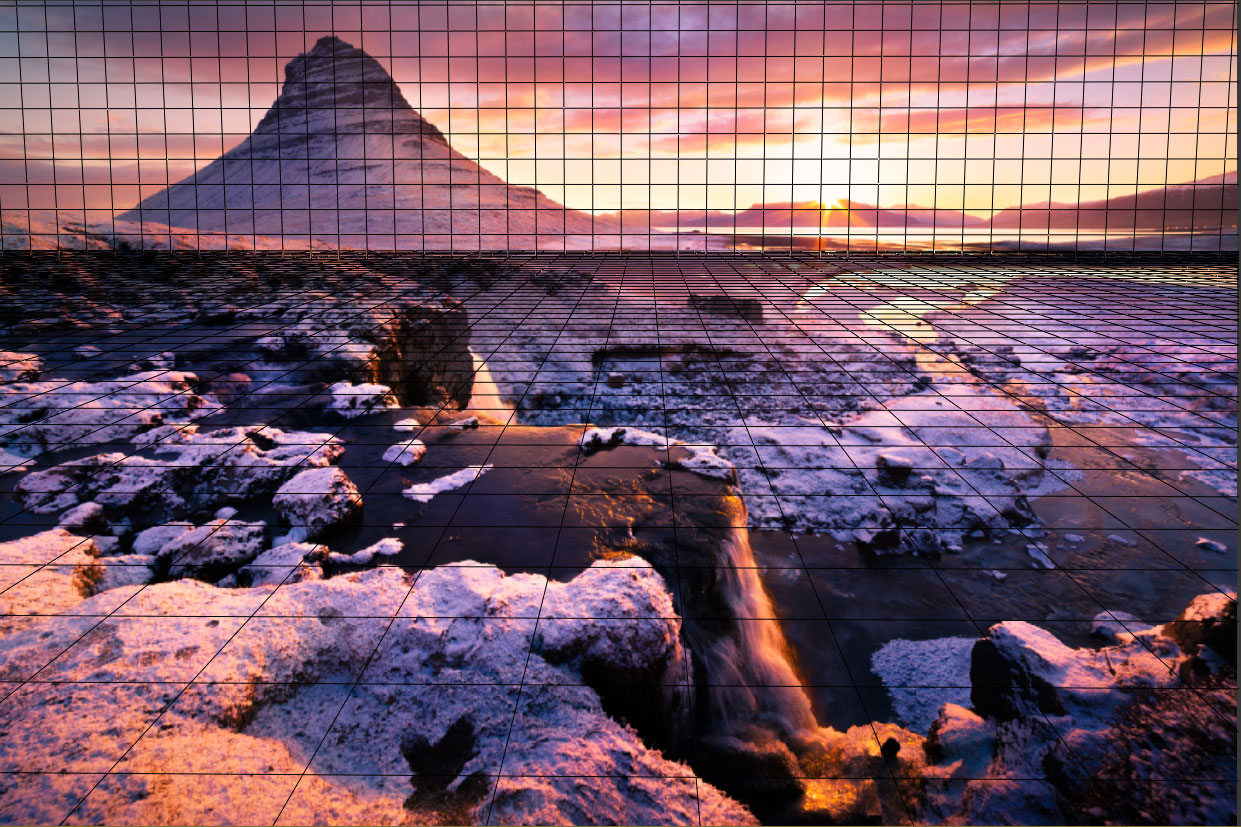
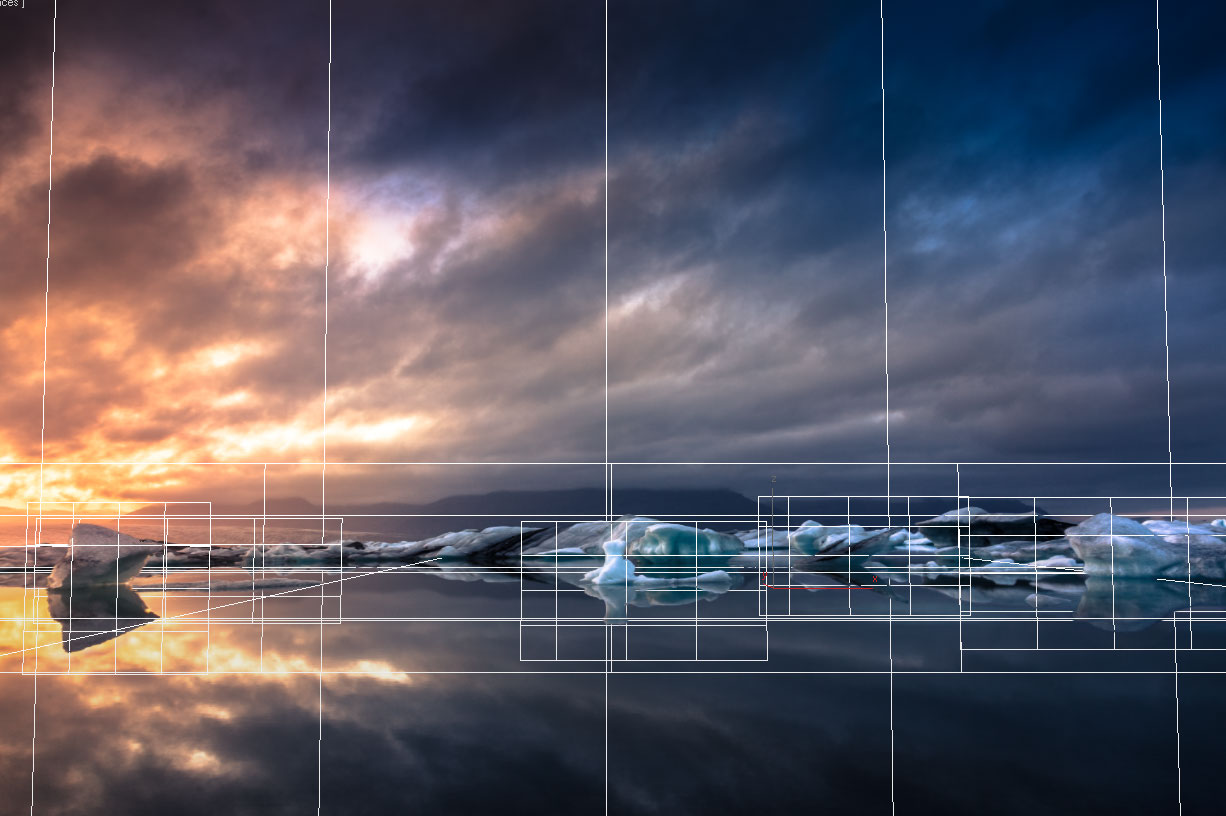
For each element in the scene use the Camera Map modifier and pick the camera that you created and that matches the one in the scene. You will immediatly see that in the viewport the 2 elements will match the backgroud perfectly. Like this:
Please note that for the camera map modifier to work you need a certain degree of teselation. Sometimes you can add it at the end sometimes you need to add geometry from now. But don’t overdo it as it gets harder to model on a teeelated mesh.
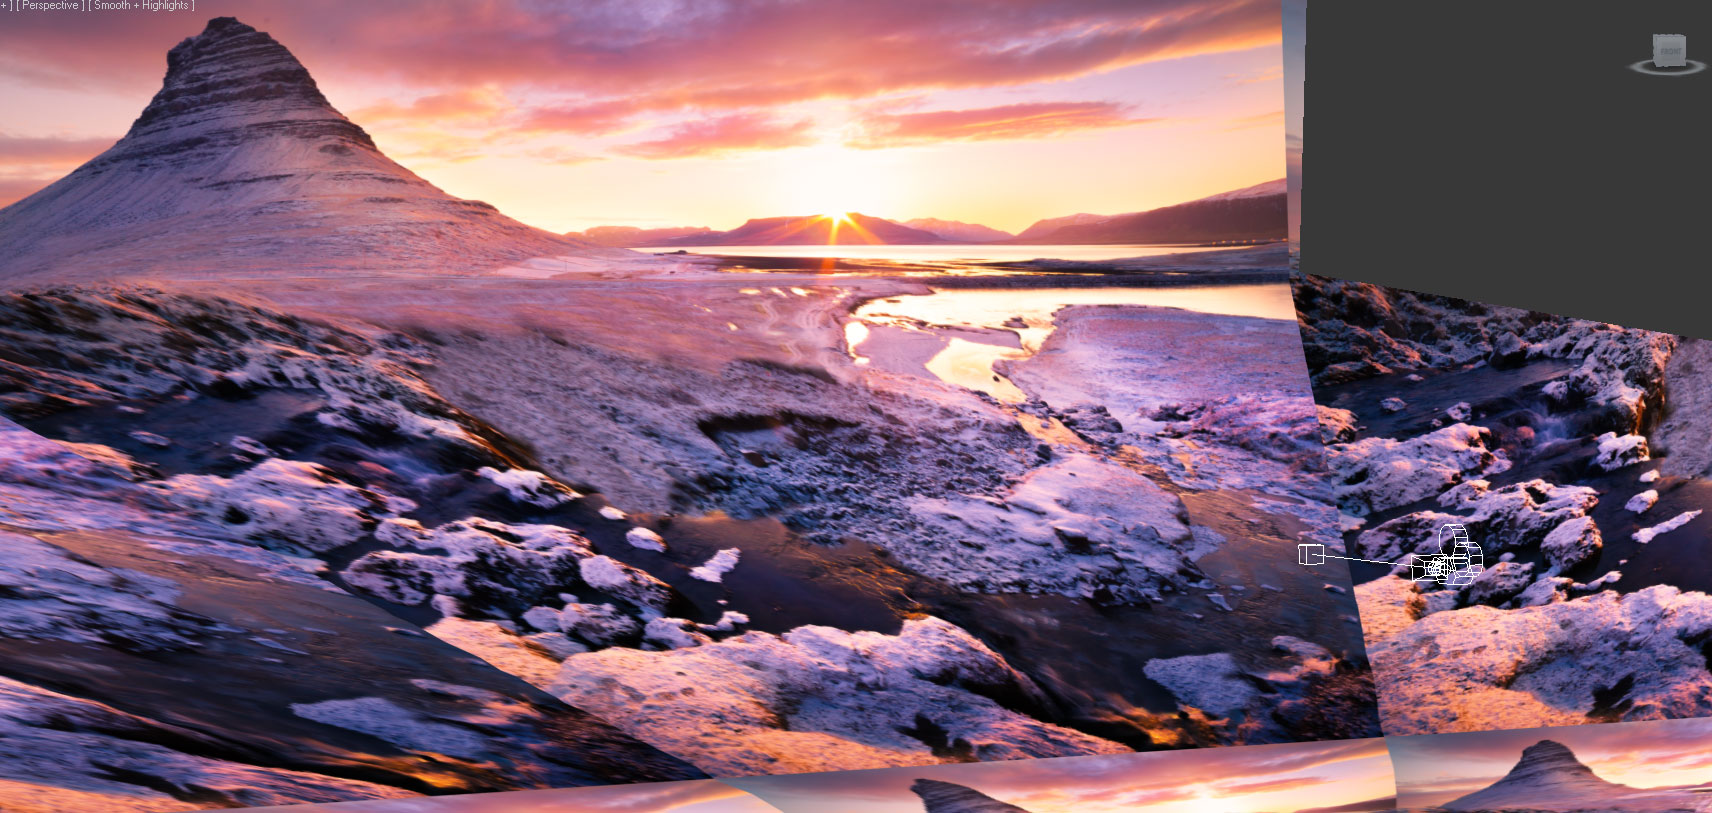
You can see that viewed from another perpective the scene looks really off. It means that you can only go so far with camera movement and it doesn’t look strange. Depending on the picture you can do more or less. In the final stage you can re-arange the elements a bit, scale the background or in some cases even extend the existing image in photoshop.
Now you have a base scene. The next steps require a lot of patience and work.
Create materials similar to the first one for each layer you created in photoshop. Use the mask you created for opacity slot.
Now what you need to do is model a base geometry that follows the real one in the scene. Work as much as possible tirectly in the camera space . From time to time animate the camera with the subtle movement that you want to achieve and see what that looks like. Remember that the camera map modifier works only for a specific frame. You can keep that frame as the first one and it represents you base scene and animate only the last one.In the final version you can animate however you want it. Always check and re-adjust to make sure the perspective is correct. Make sure that where the 3d elements meet each other they fit perfectly. Again this is mostly trial and error.
The base geometry in my case looked like this :
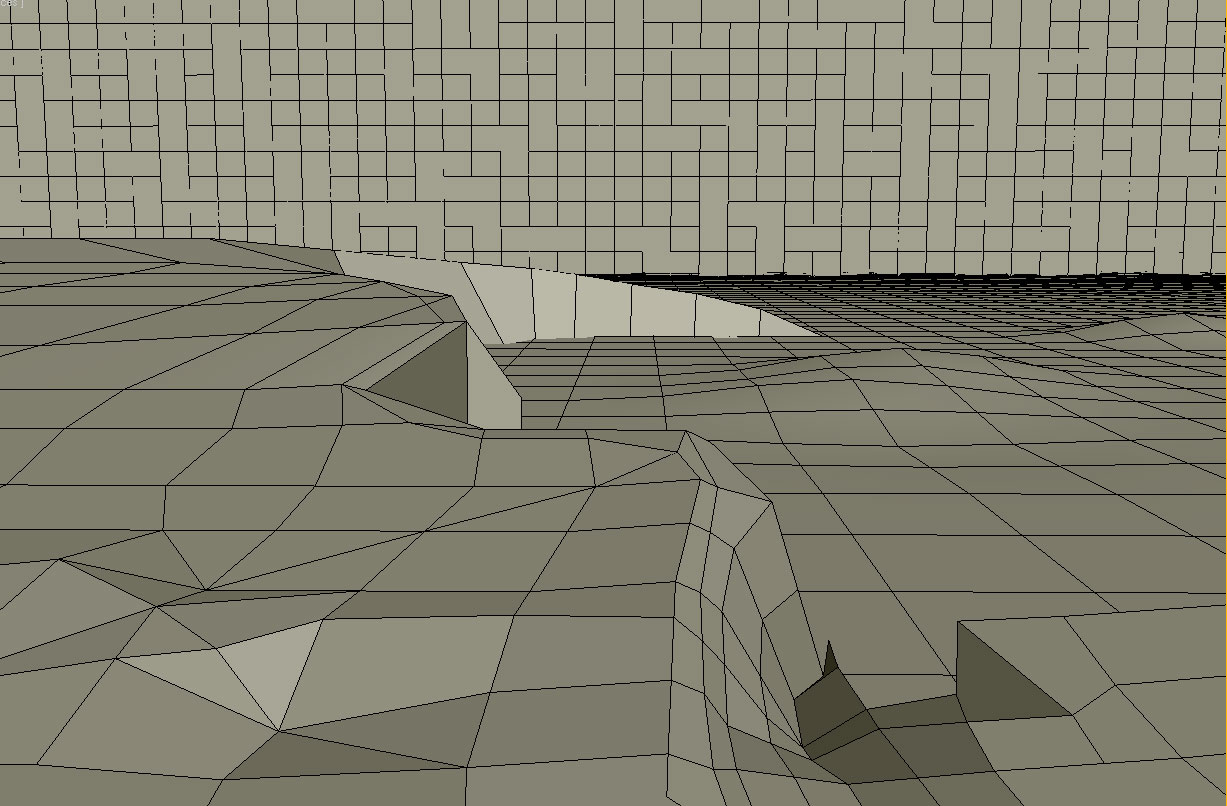
And with the textures on like this:

I need to mention that there is certain back-and-forth process I went trough between photoshop and max tweaking in each case where it was needed and there were artifacts and mismatches. Sometimes you will notice that you need an extra layer as the camera movements need to obstruct certain parts of the scene and you need an alpha there. But if you calculate very good from the start it will not be the case. You can keep the camera map modifier active as you work on the underlying edit poly and preview the results as you move and create verticses ,
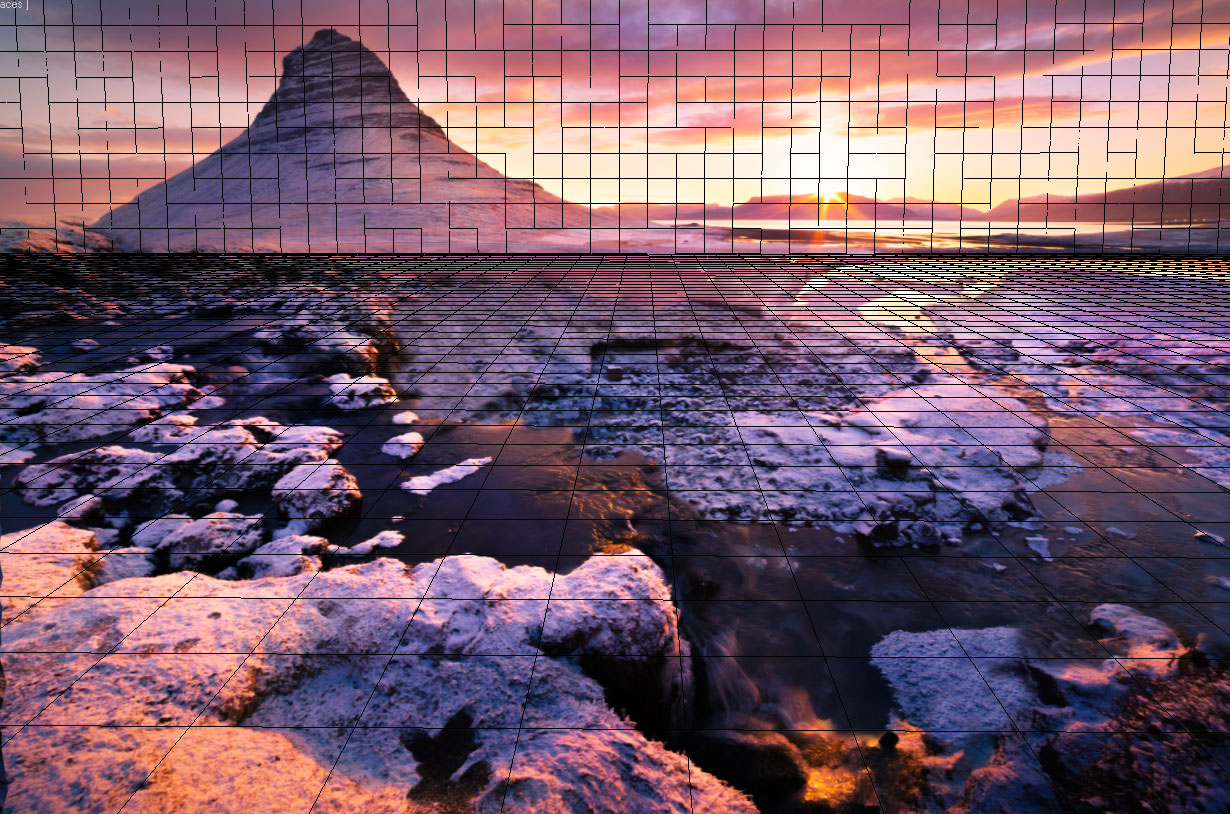
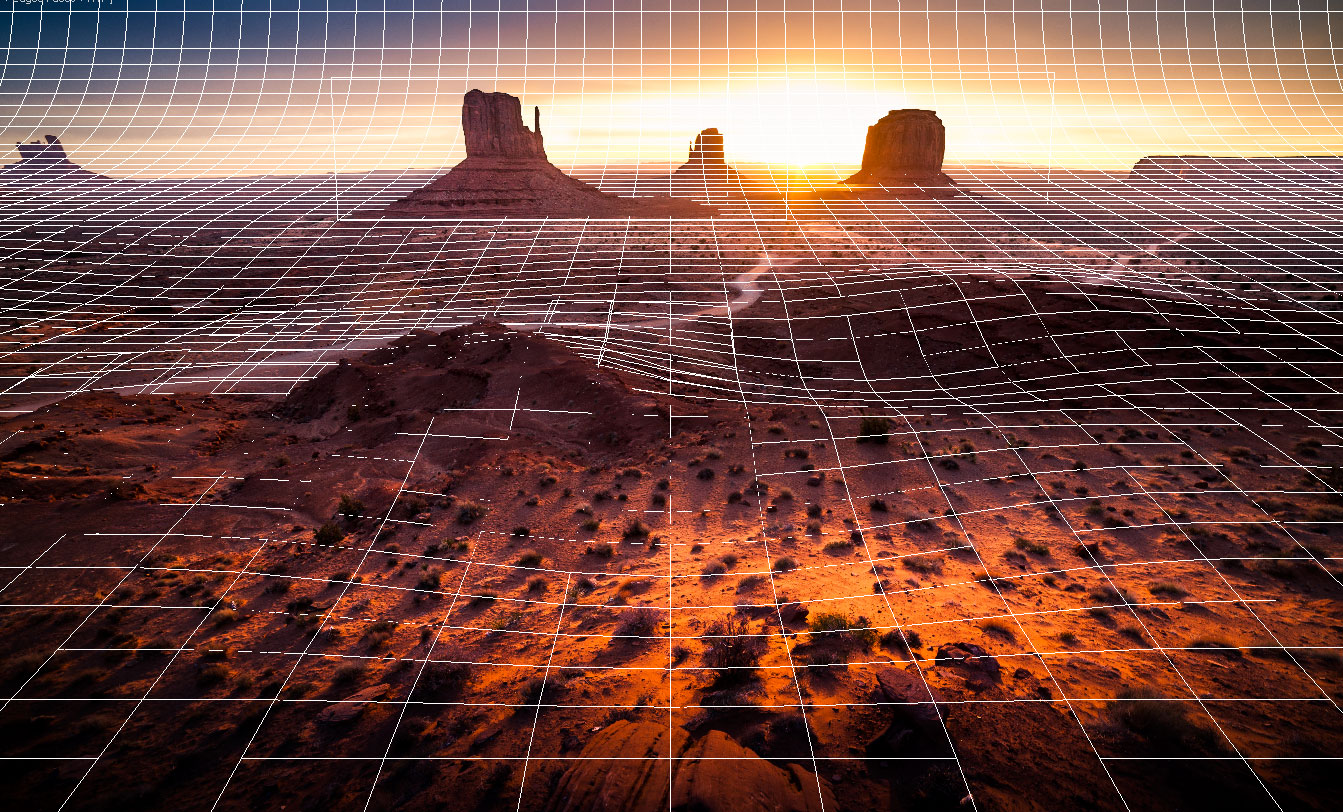
Now you have something decent. But in some cases like this one is not enough. Everything looks too flat and all the bumps and valleys seem to be missing. What you can do now is create a displacement map for the scene. Add a turbosmooth modifier with as many iterations as possible BEFORE the camera map one and AFTER the camera map modifier add the displacement modifier. Something like this:
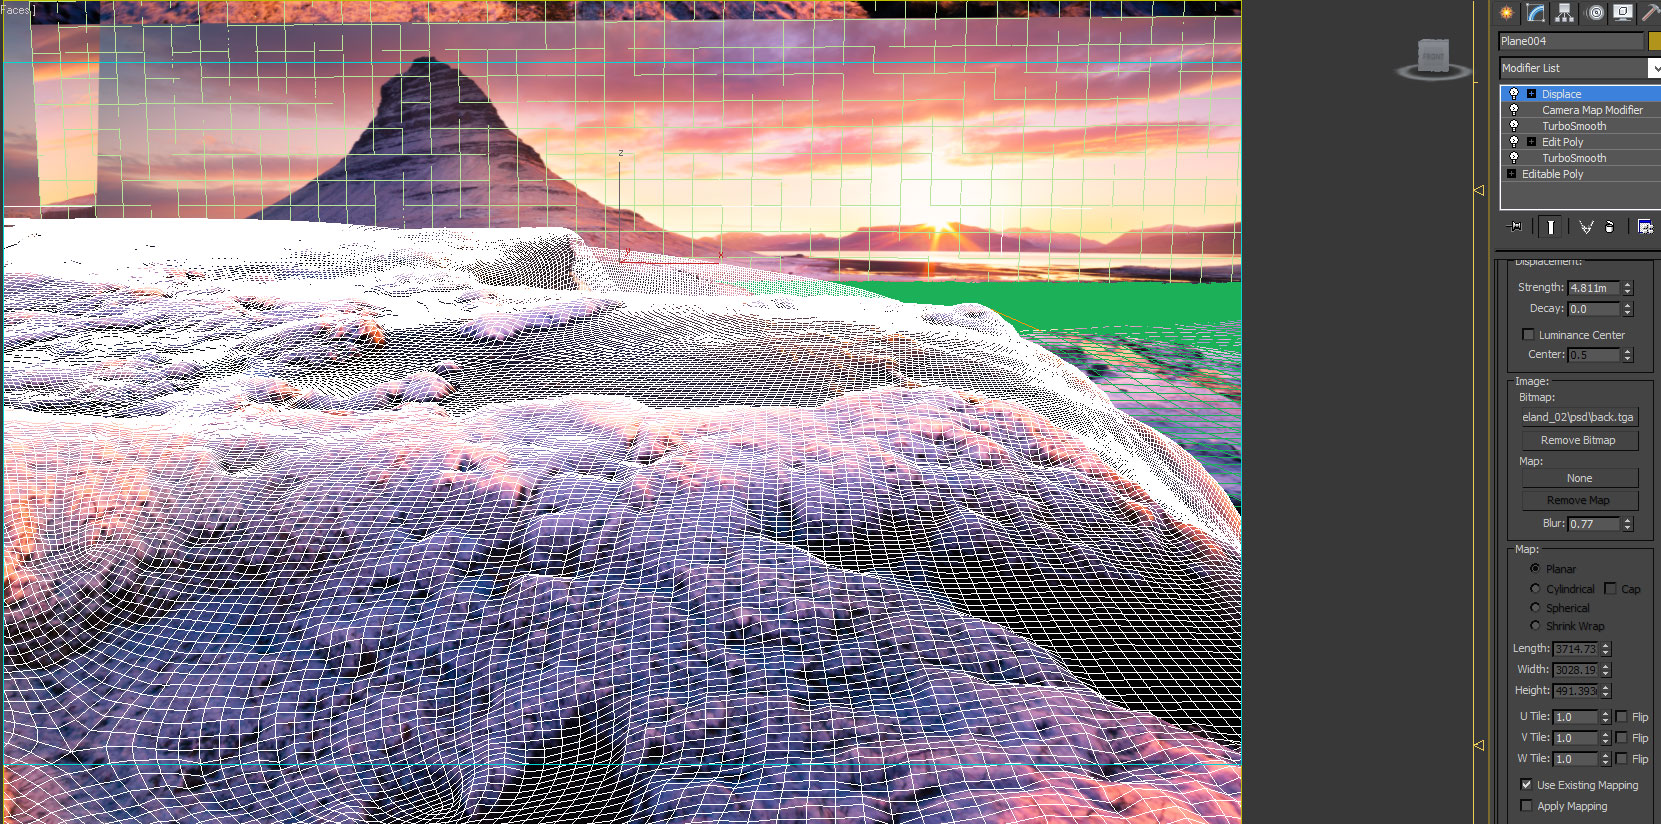
Add the map you made for displacement in photoshop or even the existing texture for that geometry. In my case the existing texture worked just fine as whiter areas were snow and snow was the most prominent relief in closeup. But you may need to make your own maps with exactly the displacement you need.
You will notice that it now looks much more realistic as you have small parallax from smaller details. Play around as much as you want, there is no clear way how to do it as it depends from case to case. Now do the final camera movement and render. I render to TGA sequence in case I need to re-render just some frames or the computer crashes.
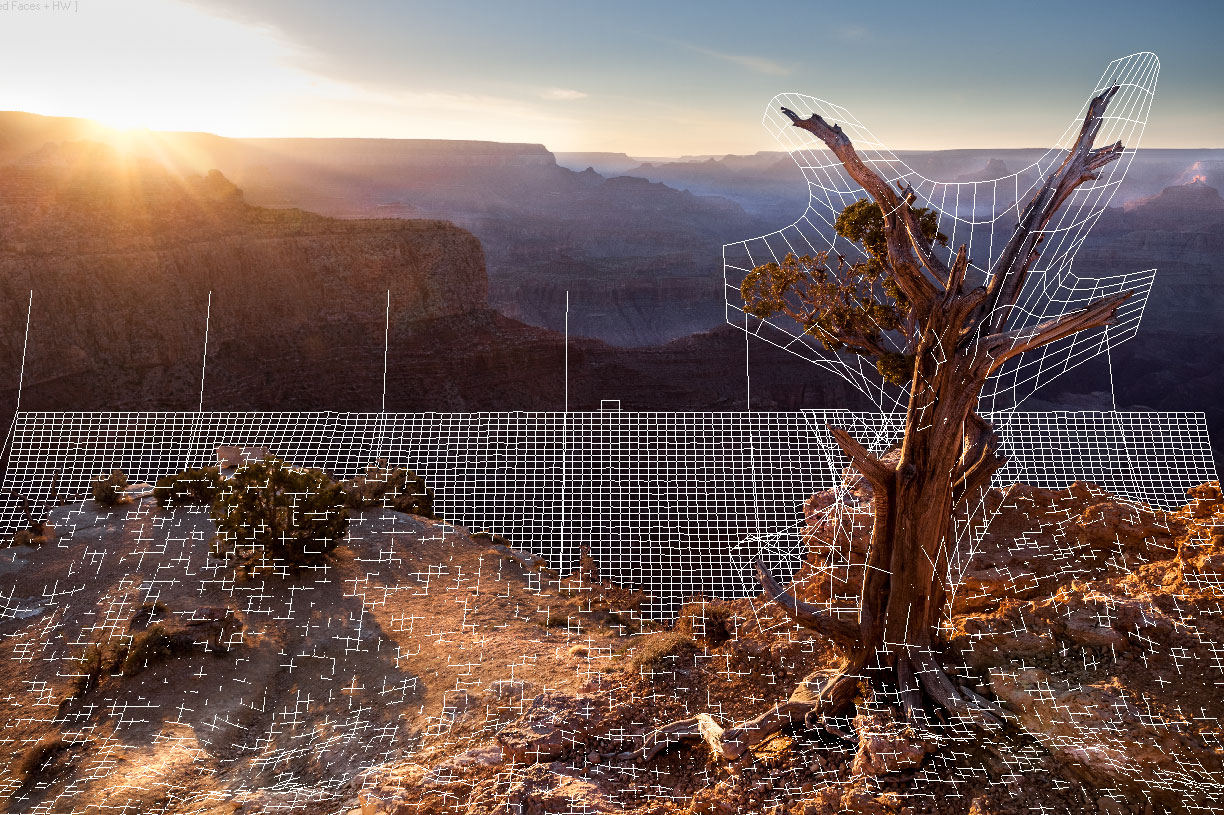
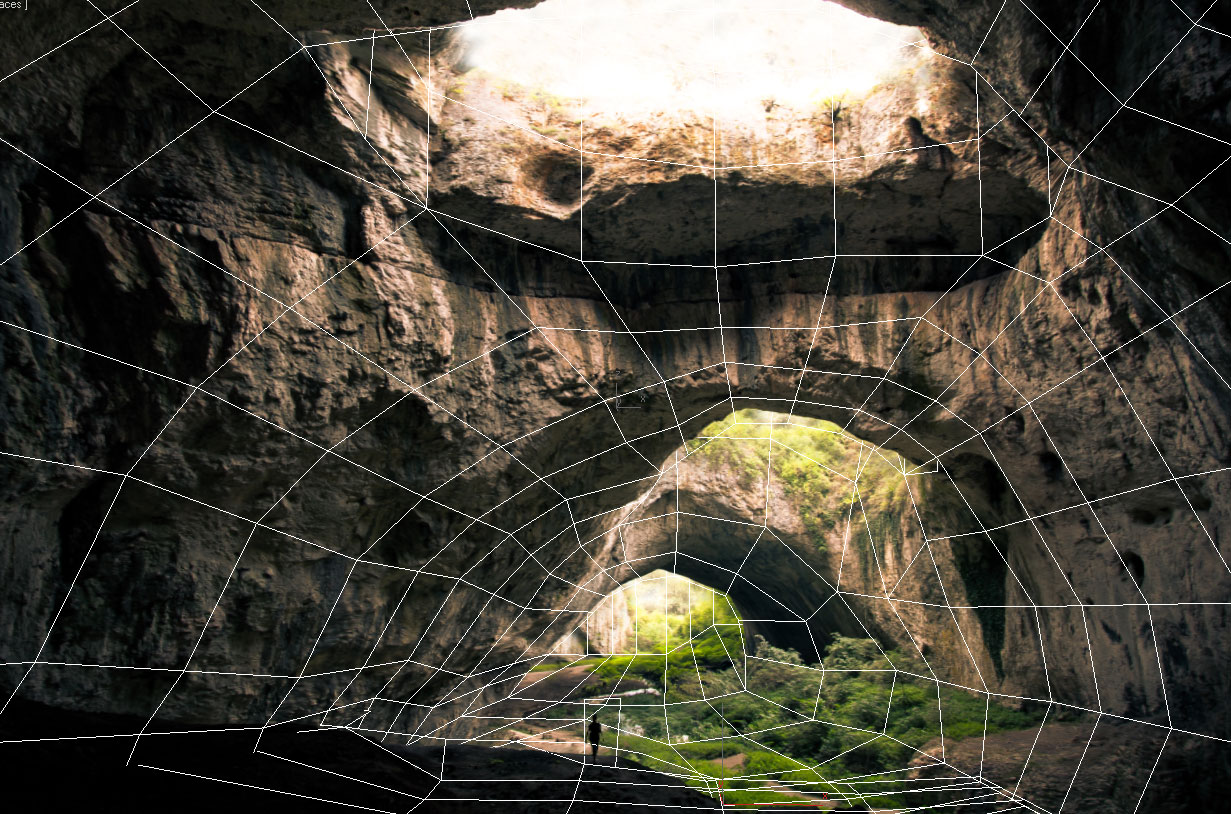
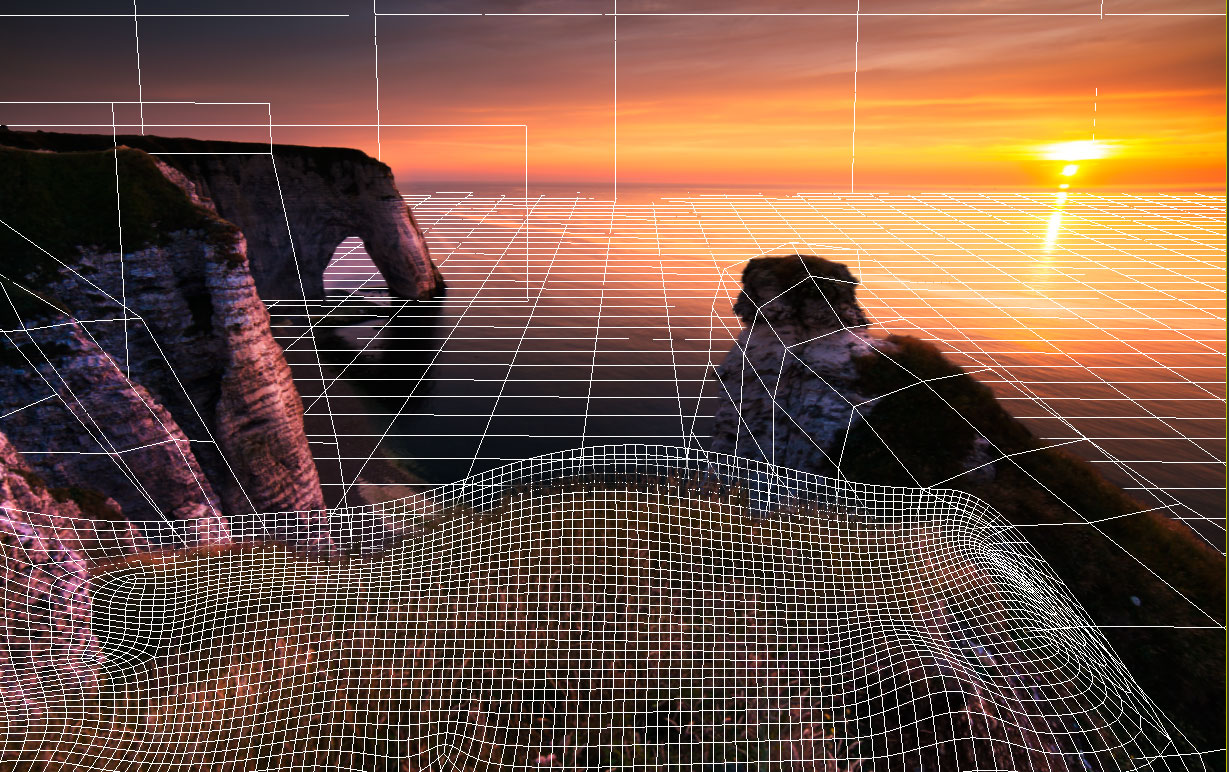
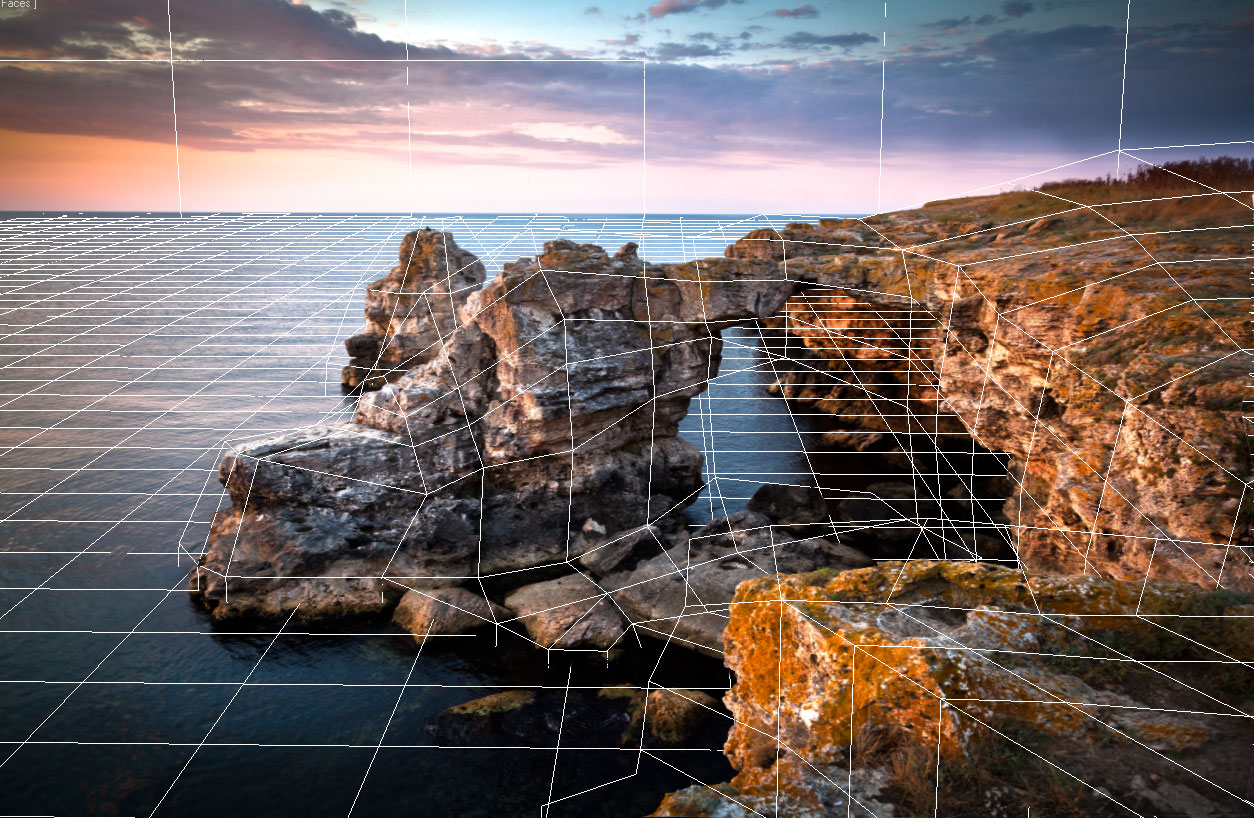
But like I mentioned all cases are different so here is how they look in wireframe :


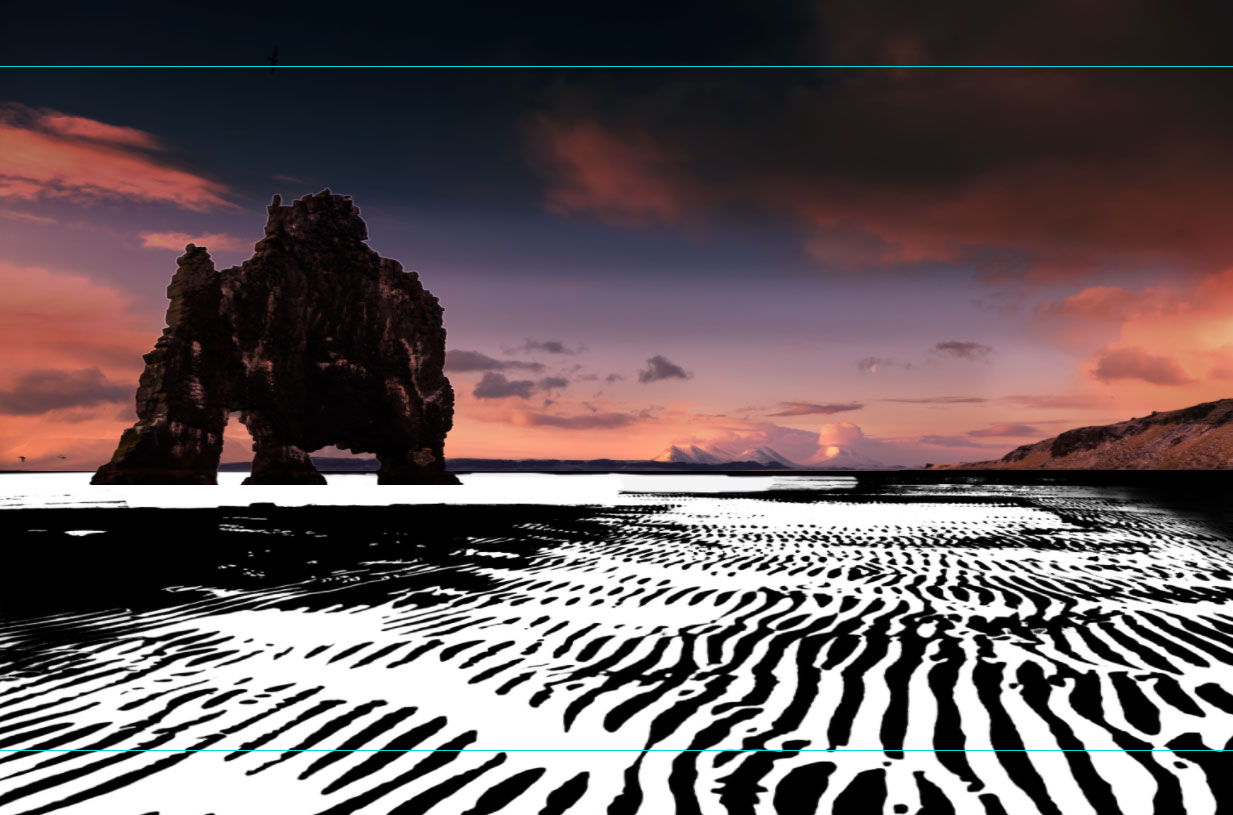
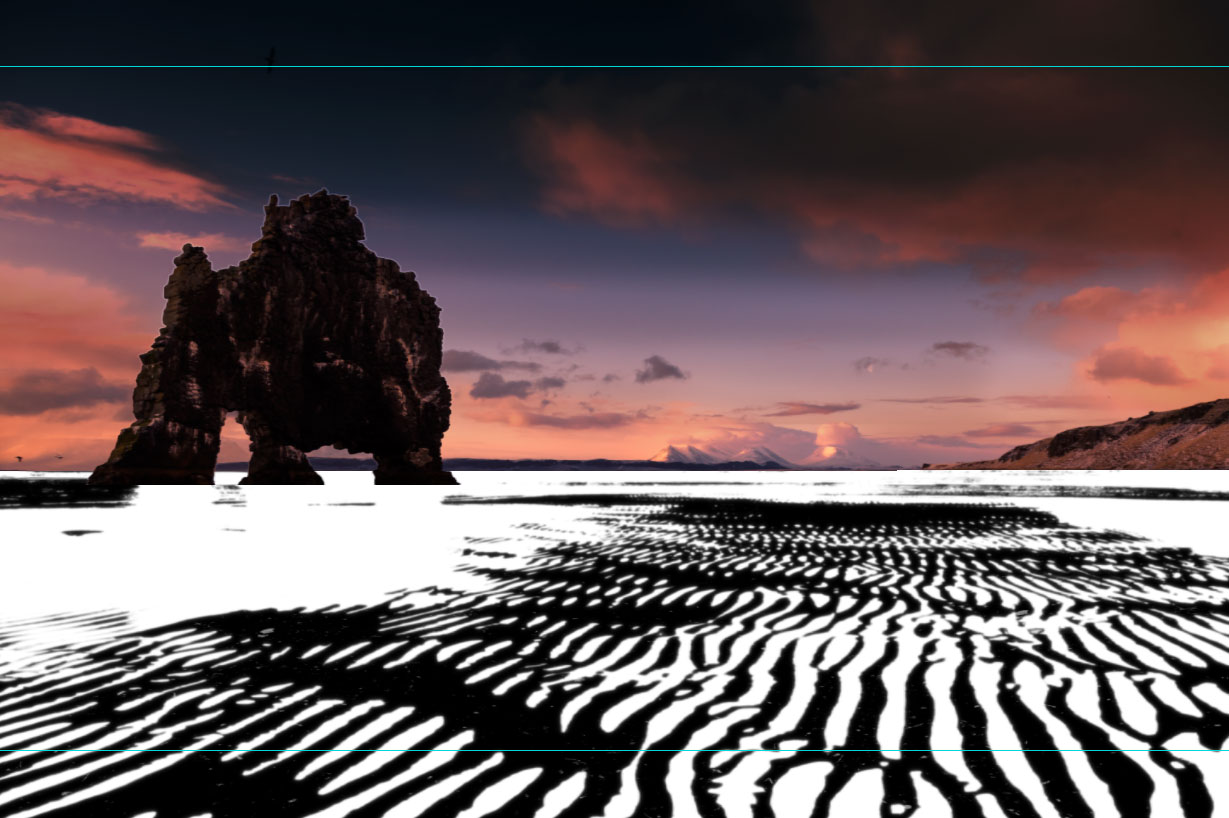
And in many cases it was crucial that I kept the reflections. There are a lot of ways to do this, some of them were simulated using refraction of the geometry underneath (like the ice lake scene) and some have actual reflections. In this case for example I needed to manually create a reflection mask for the ground plane. It was a LOT of work, I used differed techniques in photoshop but in the end the effort was worth it as you can see in the film.
Here is the mask for the reflection.
Here is the normal map I used for for the water as a base :
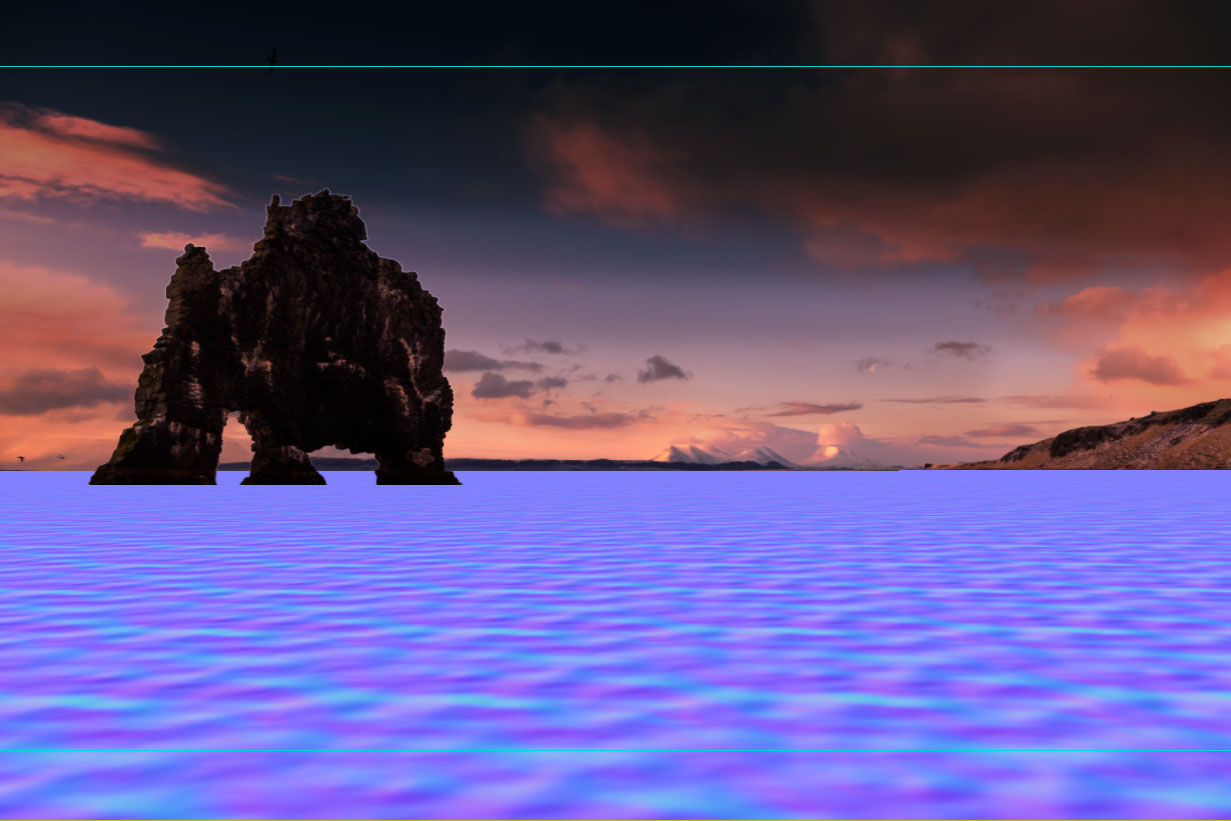
And also I created an extra bump map that I placed in the extra bump slot in 3dsmax by using the base reflection map, blurring it and adding a lot of extra fine details (like dust on the surface and stuff).
Again, subtle but the effect is worth it. I would also mentioned that the reflected geometry is not the same one . I duplicated the geometry, excluded it from main camera and it is only visible to reflect/refract (right click, object properties). The reason for that was to use another set of textures that have been tweaked in photoshop to match the intensity and colors of the ones in the original scene.
And here is a comparison between the original and rendered scene with real dynamic reflections. You guess witch one is the photo.
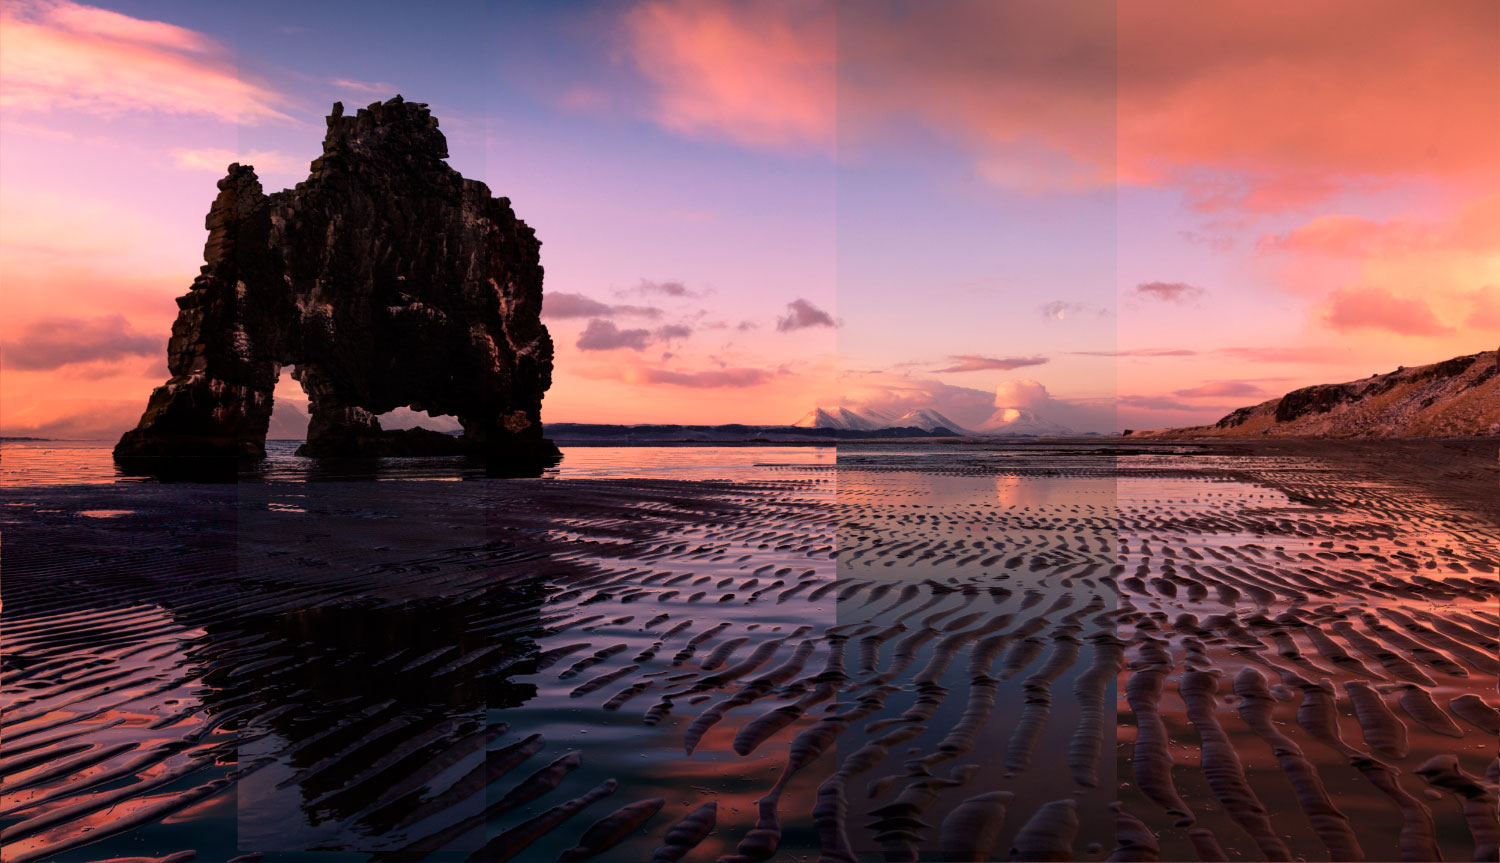
There is a gamma difference that I just noticed and the original one is less saturated as you can see. The extra bump gave it away anyway. But I think the overall effect was very good.
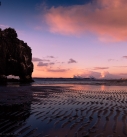
In another scene (the night ocean city) I had to use v-ray for rendering ad use glossy reflections to emulate the original long exposure effect. You can use the base photos in the beginning of the tutorial for comparison.
Final touches.
For final touches I imported the render in Adobe After Effects and added extra color correction, sharpness and an animated lens flare. For lens flares I used the Video Copilot plugin as I find it the best and most customizable. I wanted the effect to be subtle enough not to bother but visible enough you can see its dynamics adding an extra layer of realism.
Pingback: Depthy adds Parallax 3D view to your Google Camera Lens Blur photos
Parabens same, I was delighted with this piece of art, very lovely even …
Could make a video tutorial with one of those pictures, I’m sure it will be a success. Hug!!
Rodrigo
Pingback: Kirkjufell still - Best Photos - Wallpaper